Product Description
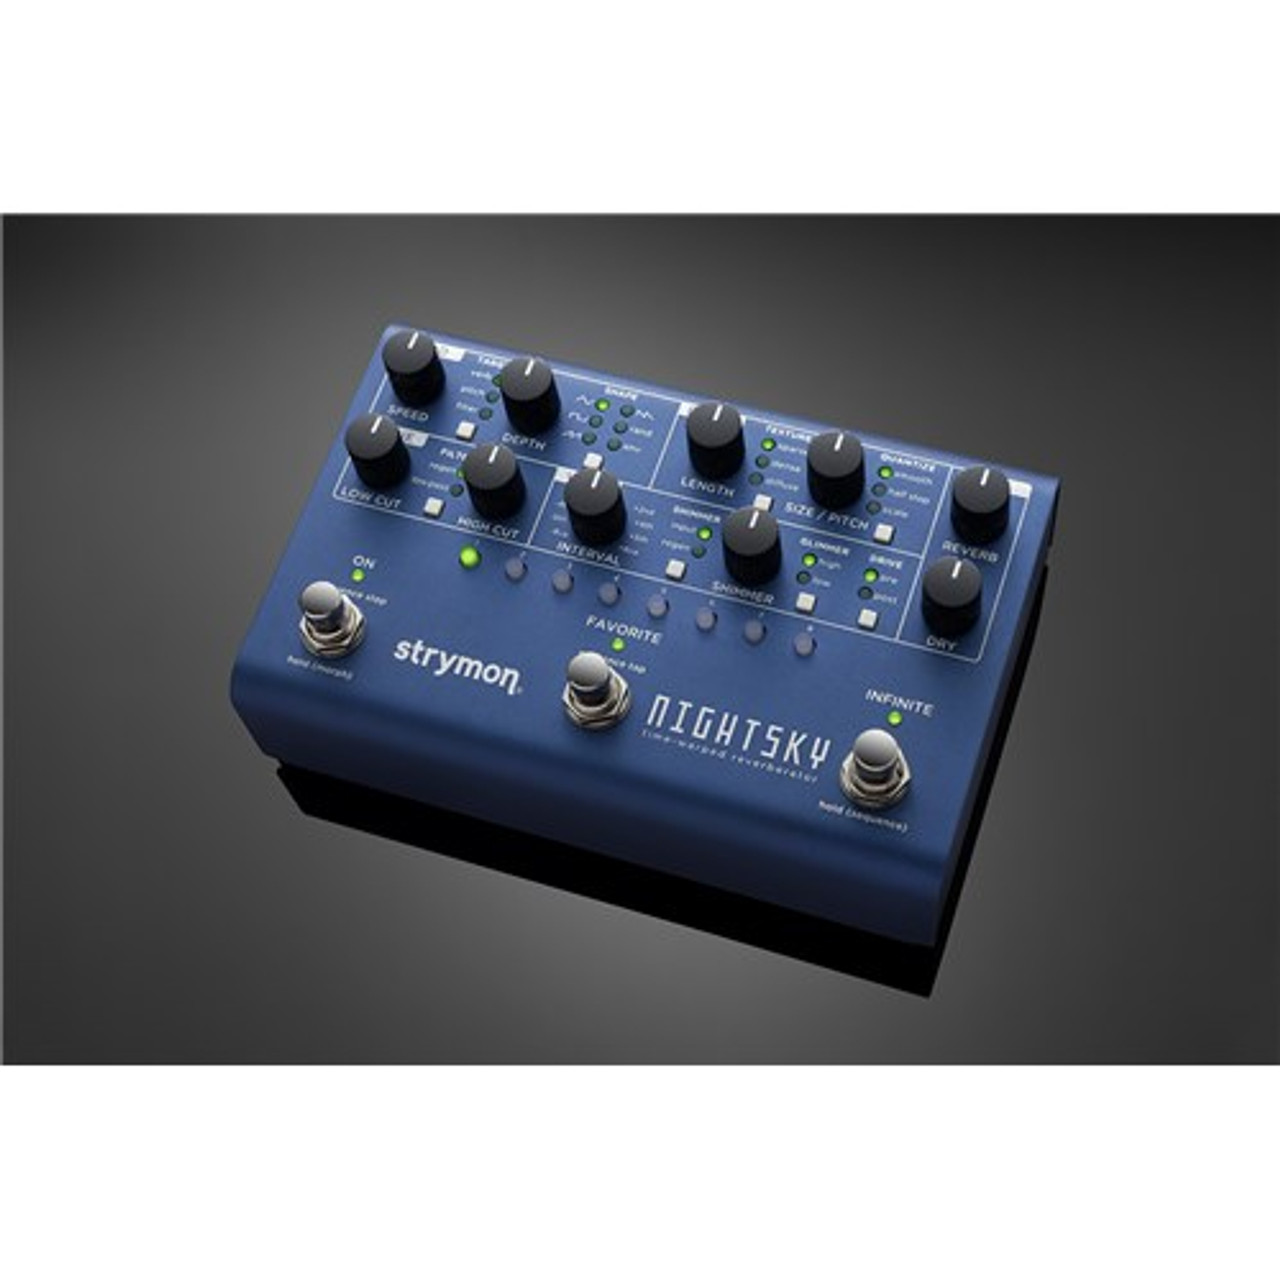
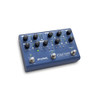
NightSky - Time-Warped Reverberato
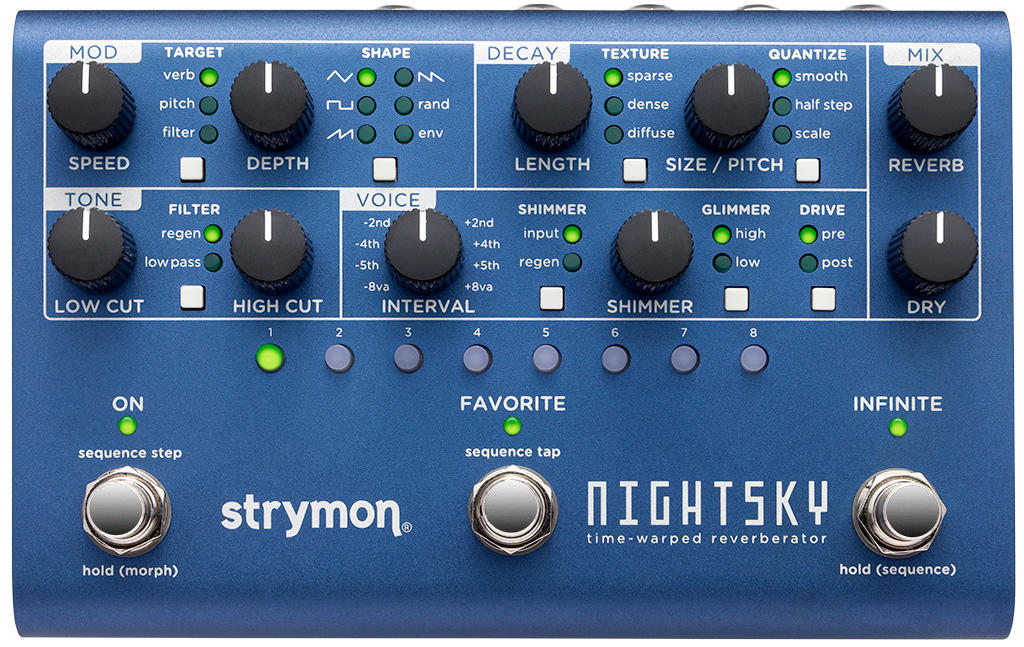
Time-Warped Reverberator.
Create vast soundscapes with just a few notes from your instrument. Apply mind-bending pitch and harmonic manipulation to your reverb tails, with synth-like filter sweeps. Enter a world of new sounds that blow away the boundaries of what is possible with reverb. With pioneers and adventurous sonic explorers in mind we created a reverb pedal that can go where none have gone before.
Reverberant Synthesis Machine.
NightSky is a reverberant synthesis workstation, and a powerful, hands-on experimental sound design platform. NightSky gives you real-time continuous control of reverb pitch/processing rate/core size, harmonics, and even a synth-like resonant filter with multiple modulation waveshapes, plus a step sequencer with variable glide. You haven’t heard a pedal like this before.
The Rules of Space and Time Have Been Rewritten. New Sonic Territory.
NightSky is a reverb pedal you will want to get your hands on. Deep and powerful sound manipulation with instant response knob-tweaking and no menu diving set a new standard in experimental reverb sound design.
Warp Core Reverb.
NightSky achieves some of its most mind bending sounds by using a Variable Process Rate for its reverb core, allowing you to simultaneously change the size of the reverb as well as the pitch. This pitch change can be completely smooth, or quantized to a variety of musical scales. And it can be sequenced.
Harmonic Sculpture Machine.
Use Shimmer to shift the harmonic structure by selectable musical intervals. Add Glimmer to dynamically enhance the harmonic spectrum. Turn up Drive to generate saturated overdriven harmonics. Then sculpt the resulting signal with NightSky’s synth-like variable-resonance low pass filter.
Sound Design
Inspiration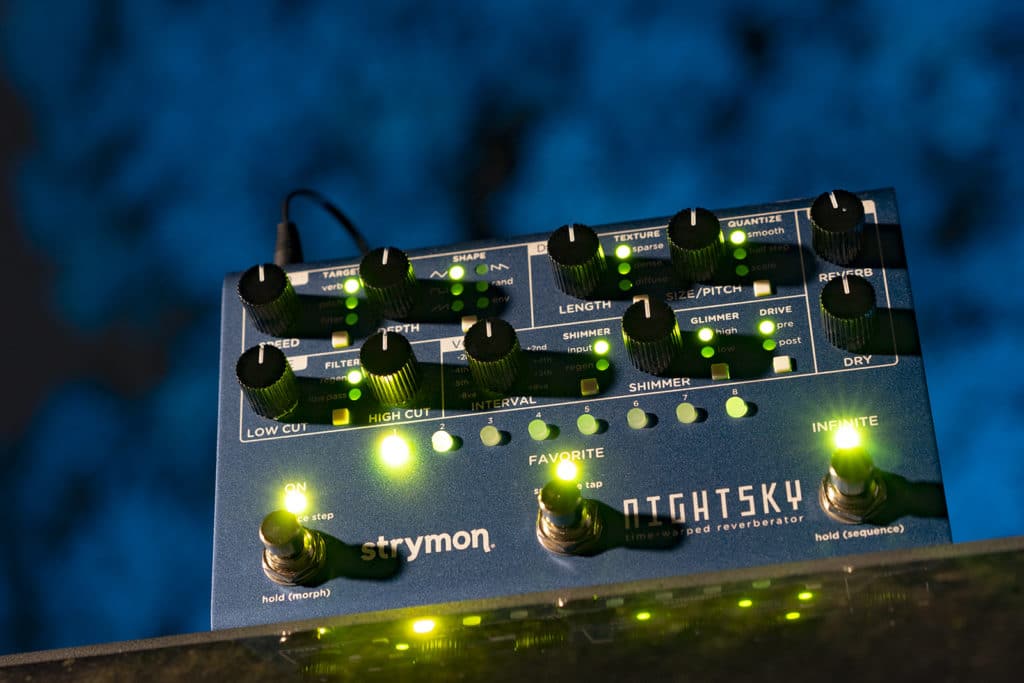
NightSky evolved from a desire to push the envelope and challenge the conventions of traditional reverb while also paying homage to the experimental reverberant sounds from decades past.
It started with the variable rate core. Once that was nailed down, we knew we had to complement it with a set of sound-shaping features that could take full advantage of the unique possibilities and expand them exponentially. This led us to a full-featured modulation section, a 4-pole resonant filter, and a unique Voice section to control the reverb’s harmonic structure.
Texture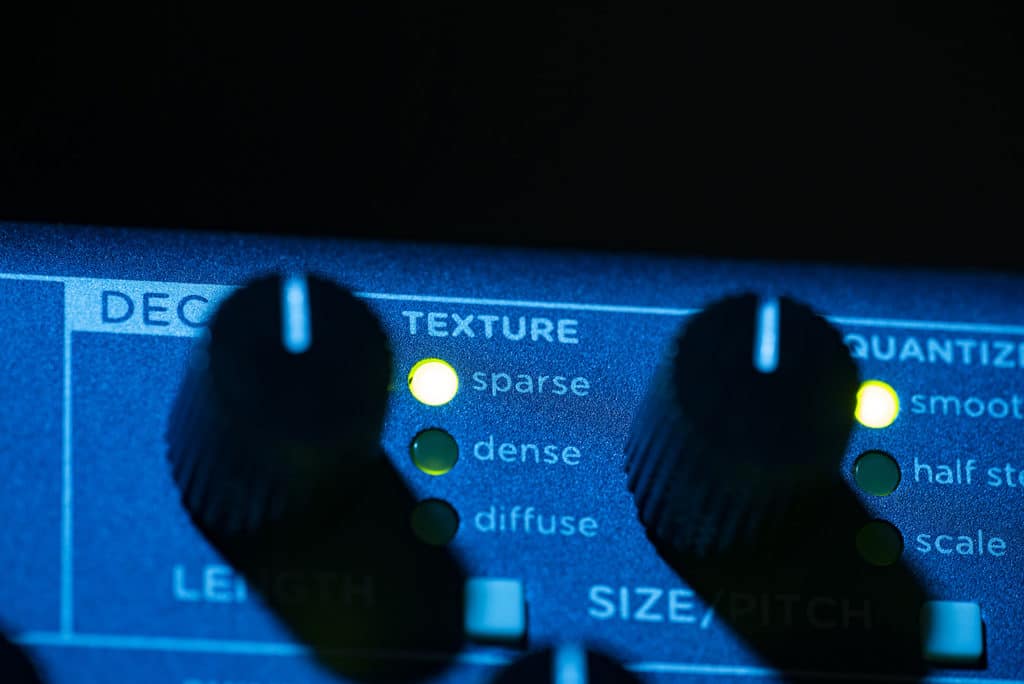
Three Reverb Textures: Sparse, Dense, and Diffuse.
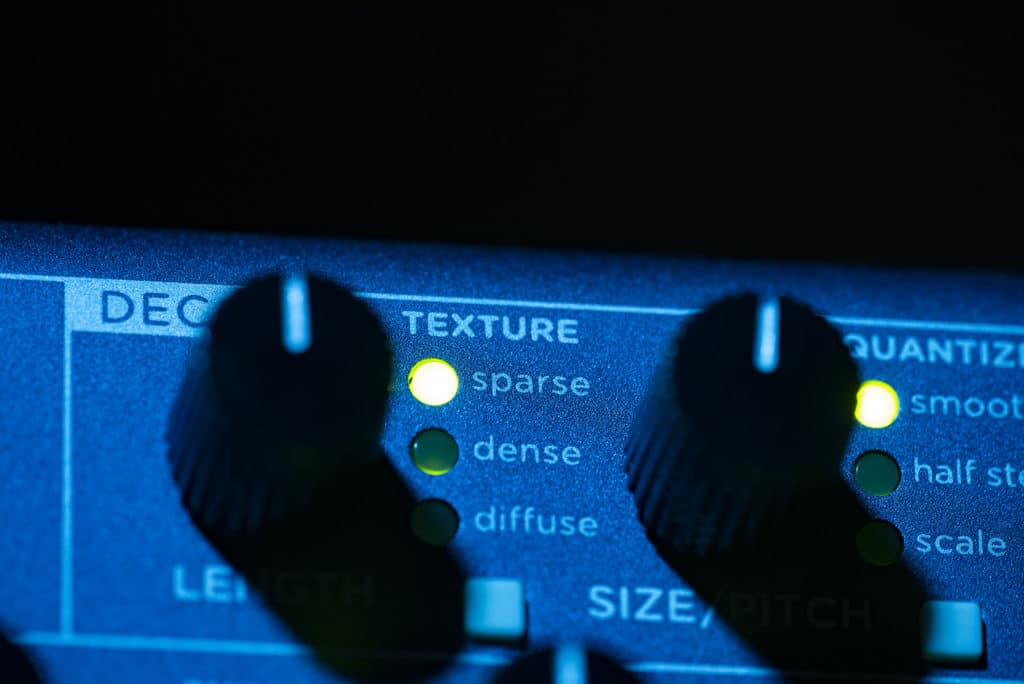
NightSky gives you three distinct Reverb textures to choose from: Sparse, Dense, and Diffuse.
The Sparse reverb creates reflections that are far enough apart from each other to be audibly distinct.
Legato notes create a lush but pleasingly clean sound field, while staccato notes reveal individual echoes in a way that is well suited for sound design and special effects.
The Dense reverb texture is an immediate-response reverb with a smooth sound field, featuring sonic characteristics similar to a plate.
The Diffuse reverb creates a slow-building, atmospheric wash that excels at ambient, swell, and even reverse-like textures. The Diffuse reverb deconstructs and spreads transients over time to achieve its bloom-like effect.
Challenge The Conventions.
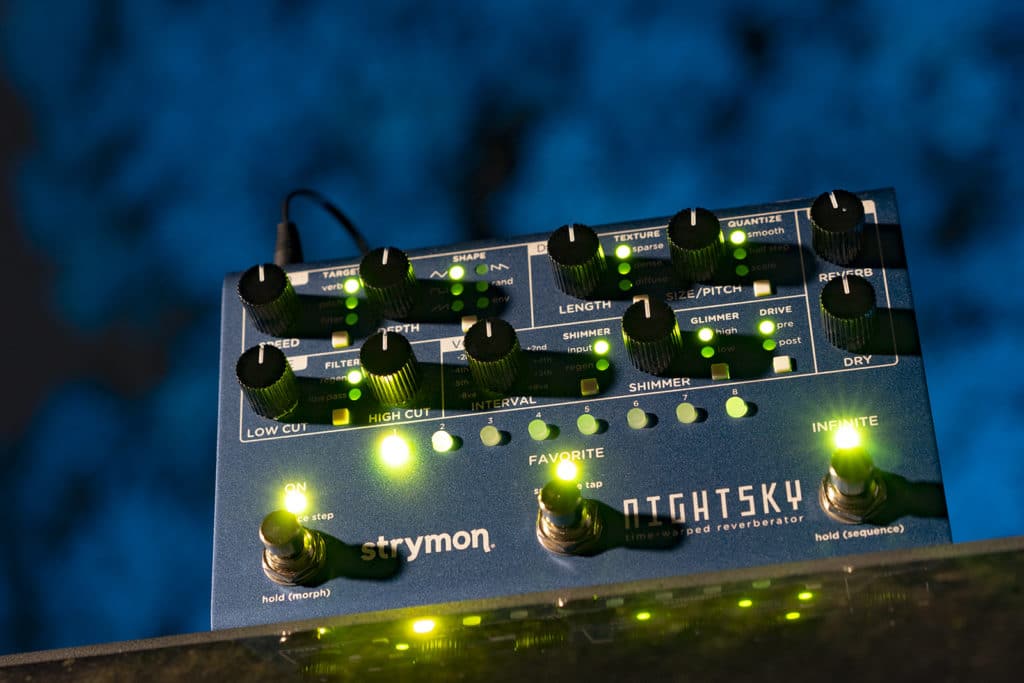
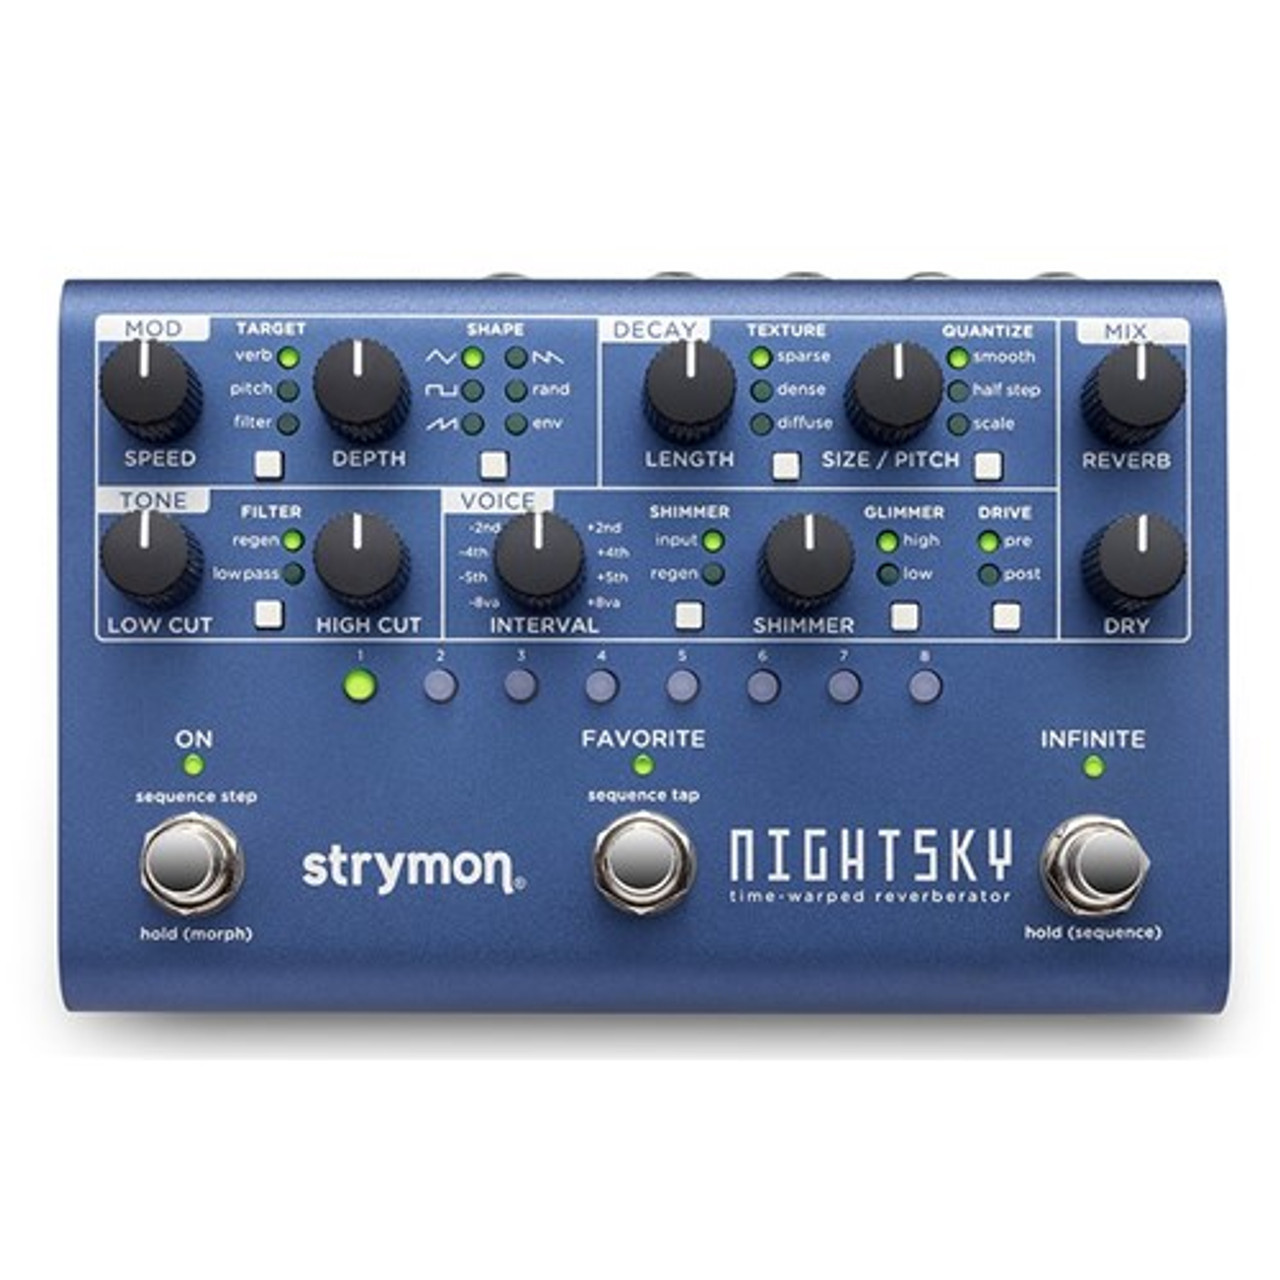
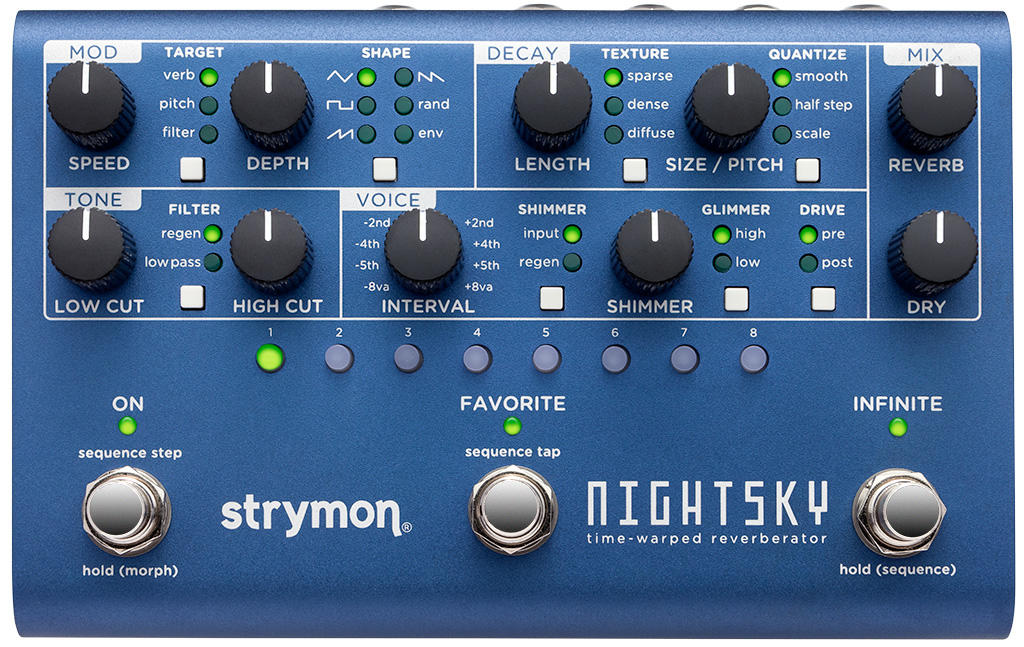
Front Panel
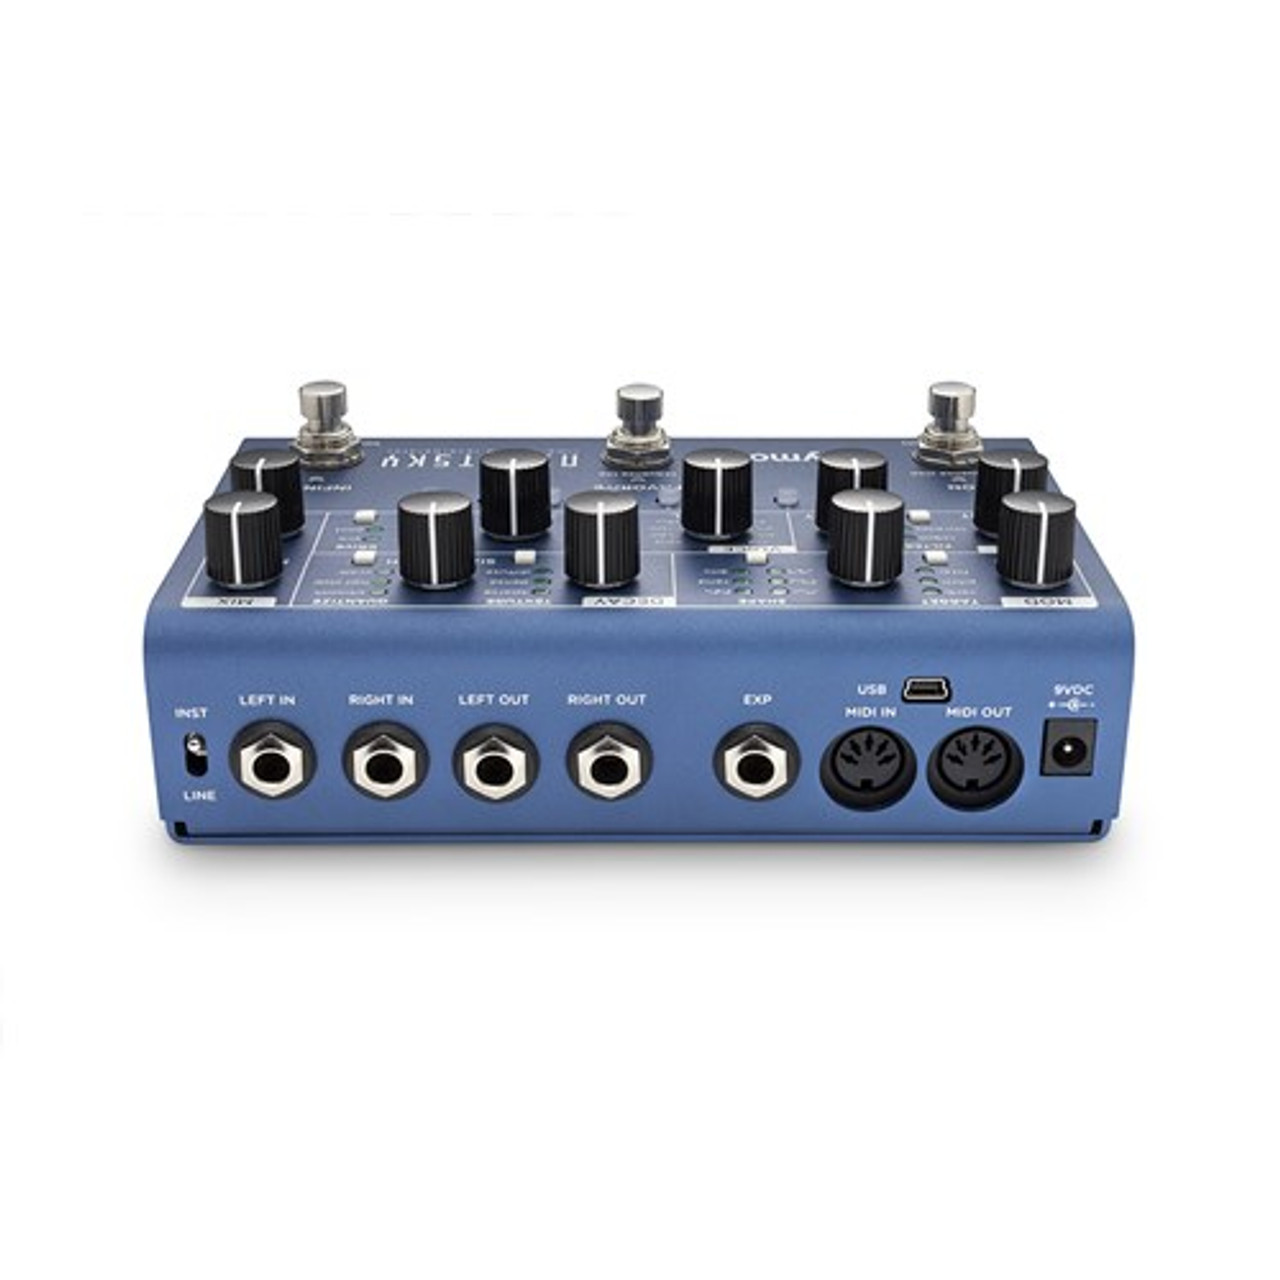
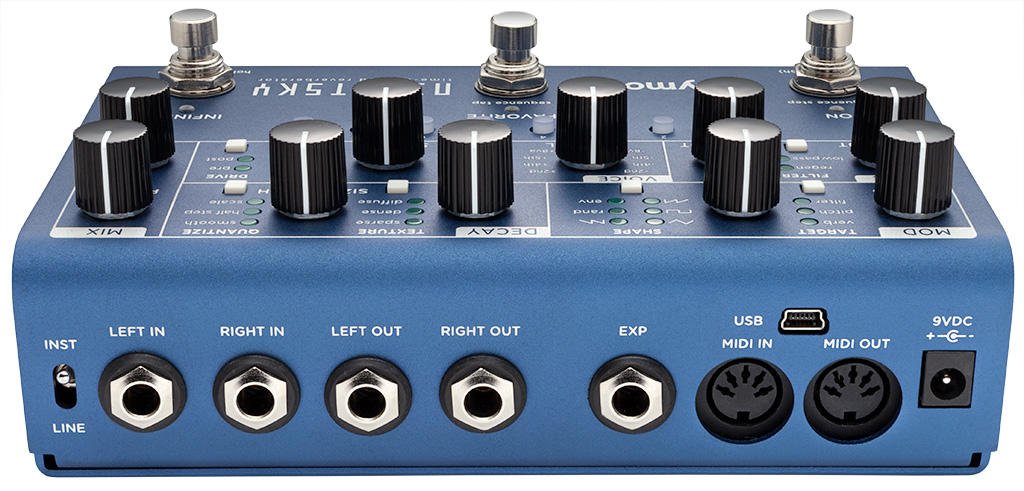
Rear Panel
Instant Access to 16 Presets.
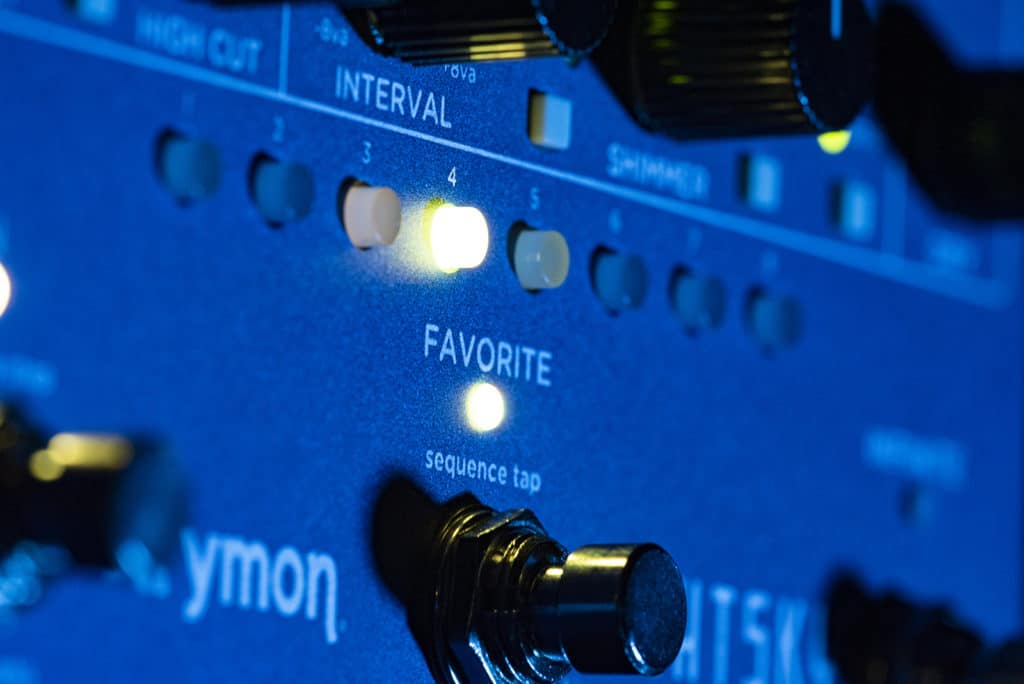
NightSky gives you instant front panel access to 16 presets.
Of course, if 16 is not enough, 300 preset locations are available via MIDI.
Specs
Sound Design
- Three selectable reverb types offer a wide variety of ambient textures
- MOD section with various waveforms to modulate the reverb or tone filters
- TONE section to sculpt the high and low EQ of the reverb
- VOICE section to enhance the aural spectrum of the reverb
- Adjustable SHIMMER for adding pitch shifting of up to +/- 1 octave to the reverb
- GLIMMER dynamically enhances high or low frequency harmonics for synth-like textures
- Pre or Post DRIVE to add saturated overdriven harmonics to the reverb
- Adjustable reverb core size to increase or decrease the space for reflections
- Independent REVERB and DRY level controls
- Step sequencer for programming rhythmic pitch variations of the reverb
- Access to 16 presets from the front panel and 300 presets via MIDI
Ins, Outs, and Switches
- High impedance ultra low-noise discrete Class A JFET preamp stereo inputs
- Low impedance stereo outputs
- Input Level switch allows for both instrument and line level signals
- On, Favorite, and Infinite footswitches
- Expression pedal input allows the connection of an expression pedal, MultiSwitch Plus, or 1/4” to MIDI cable
- Full featured MIDI in/out supporting MIDI CCs, program changes, MIDI clock sync and more
- USB jack for controlling via MIDI from a computer or for performing firmware updates
Audio Quality
- Analog dry path for a zero latency dry signal that is never converted to digital
- Premium JFET analog front end
- Ultra low noise, high performance 24-bit 96kHz A/D and D/A converters provide uncompromising audio quality
- Super high performance SHARC DSP
- 32-bit floating point processing
- 20Hz to 20kHz frequency response
- Audio Input Impedance: 1M Ohm
- Audio Output Impedance: 100 Ohm
More
- True Bypass (electromechanical relay switching) or selectable transparent Analog Buffered Bypass
- Strong and lightweight anodized dark blue aluminum chassis
- 9V DC power supply included
- Power requirements: maximum 9 volts DC center-negative, with a minimum of 300mA of current
- Dimensions:
- 4.5″ deep x 7″ wide x 1.75″ tall
- 114.3 mm deep x 177.3 mm wide x 44.5 mm tall
- Designed and built in the USA
What is NightSky?
NightSky is a stereo reverb with a wide range of hand-on control for experimental sound design. Features include real-time continuous control of reverb pitch/processing rate/core size, harmonics, and a synth-like resonant filter with multiple modulation waveshapes. There is also an 8 step reverb pitch sequencer with variable portamento.
How does each section of NightSky work?
From the top panel, there are several different sections in the NightSky user interface to provide a wide range of control over the reverb signal. Here is a diagram of the signal flow routing within NightSky to show how the audio is processed by each section:

MOD
The MOD section varies a selectable target parameter in the shape of the selected waveform.
TARGET – Selects the process that the modulation is applied to. Press the button to select one of three options.
verb: Modulates the delay lines within the regenerating reverb core.
pitch: Modulates the size (process rate) of the reverb core.
filter: Modulates the HIGH CUT tone control position.
SHAPE – Selects the modulating waveform shape. Press the button to select one of six options.
triangle: Wave rises and falls evenly. When TARGET is set to filter, it becomes a sine wave with smooth, continuous ‘S’-shaped oscillation.
square: Wave jumps between two fixed values.
ramp: Wave rises gradually and falls abruptly.
saw: Wave falls gradually and rises abruptly.
random: Wave jumps between random values.
env: Modulation value responds to your input dynamics with the sensitivity set by the DEPTH knob, and returns at a rate set by the SPEED knob. The envelope is negative on left half of the DEPTH knob and positive on right half, with maximum sensitivity at the extremes. The middle position of the DEPTH knob is OFF when env is selected.
SPEED – Adjusts the rate of modulation from 0.06Hz (16 second sweep) to 12Hz (0.08 second sweep).
DEPTH – Adjusts the amount of modulation. Modulation is off at the fully counter-clockwise position.
- When env is selected, modulation is off at noon. Sensitivity increases as the knob is rotated away from center. Rotate left for negative envelope response or right for positive.
DECAY
Selects the reverb architecture and sets the tail characteristics.
TEXTURE – Selects one of three different reverb types.
sparse: Granular-sounding reverb that can create interesting effects with staccato inputs, or produce a clean reverb with sustained inputs.
dense: Plate-like reverb with a fast response and dense reflections that can venture into ambient territory at high decay times.
diffuse: Slow-building, atmospheric wash that excels at ambient, swell, and even reverse-like textures.
QUANTIZE – Selects the response and range of the SIZE/PITCH knob. Press the button to select one of three options.
smooth: SIZE/PITCH varies smoothly and continuously over a 2.5 octave pitch range.
half step: SIZE/PITCH is quantized into half-step intervals over a two octave range.
scale: SIZE/PITCH is quantized into selectable scales over a two octave range.
NOTE: For both half-step and scale
Noon = middle of range.
Minimum = one octave up.
Maximum = one octave down.
Scale Select (Live Edit function) – Select one of eight scales that determine the quantization intervals of the SIZE/PITCH knob when QUANTIZE is set to scale mode.
- To select a scale, press and hold the QUANTIZE button and press the PRESET BUTTON that corresponds with the scales noted below. Status shown by illuminated PRESET BUTTON.
- PRESET BUTTON 1 = minor pentatonic scale
- PRESET BUTTON 2 = major pentatonic scale
- PRESET BUTTON 3 = major scale
- PRESET BUTTON 4 = dorian scale
- PRESET BUTTON 5 = minor blues scale
- PRESET BUTTON 6 = harmonic minor scale
- PRESET BUTTON 7 = whole tone scale
- PRESET BUTTON 8 = diminished scale
LENGTH – Adjusts the reverb decay time from less than one second to nearly infinite sustain. At long decay settings, decay time may be impacted by the TONE settings.
SIZE/PITCH – Increases the size of the reverb core to create a larger “space” for reflections as the knob is turned clockwise which also allows for pitch variations during adjustment. The pitch range is 2.5 octaves with QUANTIZE set to smooth and two octaves with QUANTIZE set to half step or scale.
Pre-Delay (Live Edit function) – Adjusts the time between the dry signal and the onset of the reverb.
- To adjust Pre-Delay, press and hold the TEXTURE button and, turn the REVERB knob. (left = shorter, right = longer).
TONE
Applies filtering equalization to the high and low frequency portions of the reverb.
FILTER – Selects the response of the HIGH CUT knob. Press the button to select one of two options.
regen: Removes high frequencies from the regenerating core, creating a reverb that gets darker as it decays.
low pass: Applies a synth-style peaking, high frequency roll-off to the reverb output, selectively shaping the frequency content. The low pass filter’s resonance amount can be controlled via the Low Pass Q Live Edit function.
LOW CUT – Removes low end content both at the output and in the regenerating core portion of the reverb as the knob is turned clockwise.
HIGH CUT – Removes high frequency content from the reverb as the knob is turned clockwise, with characteristics determined by the FILTER switch selection.
Low Pass Q (Live Edit function) – Adjusts the filter Q, or resonance.
- To adjust Low Pass Q, press and hold the FILTER button and turn the REVERB knob to adjust. Higher values result in a peaking response. Lower values create a gradual roll-off.
VOICE
Adds pitch, harmonics, and distortion effects to the reverberated signal.
SHIMMER (button) – Selects the type of pitch-shifted shimmer effect. Press the button to select one of two options.
input: Shimmer effect is applied to the input of the reverb core and does not regenerate.
regen: Shimmer effect is applied within the reverb core and the effect is regenerative, resulting in continuously ascending or descending pitches as the reverb decays. NOTE: Smaller SIZE/PITCH settings and higher DECAY settings will result in more intense pitch regeneration.
INTERVAL – Selects the pitch interval of the shimmer effect from the options around the knob. 2 octaves of total range from -1 octave to +1 octave.
- Two additional INTERVAL options (-detune and +detune) are available around the 12 o’clock noon position of the knob.
- Additional INTERVAL options are available via MIDI by sending MIDI CC# 26 with values 0-25. 2 octave range with each value for CC#26 representing a half-step increment.
- ex. value 0 = -1 octave, value 2 = -minor 7th, value 8 = -major 3rd, value 19 = +tritone, value 25 = +1 octave
SHIMMER (knob) – Sets the amount of the shimmer effect applied to the reverb signal. Shimmer effect is off when set to minimum.
GLIMMER – Dynamically enhances aspects of the input signal’s harmonic spectrum. Press the button to select one of three options.
high: Higher frequency harmonics are accentuated creating a washy, dreamy top end.
low: Lower frequency harmonics are enhanced creating mysterious and synth-like textures.
LED off: GLIMMER is disabled.
Glimmer Gain (Live Edit function) – Adjusts the sensitivity of the Glimmer block to the input signal.
- To adjust Glimmer Gain, press and hold GLIMMER button and, turn REVERB knob.
DRIVE – Adds saturated overdriven harmonics with a soft clipping characteristic to the reverb. Press the button to select one of three options.
pre: Applies DRIVE to the signal before the reverb core.
post: Applies DRIVE after the reverb core, allowing the reverb tail to dynamically go into and out of saturation as the reverb decays.
LED off: DRIVE is disabled.
Drive Gain (Live Edit function) – Adjusts the sensitivity of the DRIVE block to the input signal.
- To adjust Drive Gain, press and hold the DRIVE button and turn the REVERB knob.
MIX
Adjust the level of the dry and reverb signals at the outputs.
REVERB – Sets the output level of the reverberated signal.
DRY – Sets the output level of the unprocessed signal. Set to 12 o’clock position for unity gain.
How do you Save and Recall Presets on NightSky?
There are 16 on-board presets that are accessible by using the 8 PRESET BUTTONS on NightSky. They are arranged in 2 banks of 8 presets with different PRESET BUTTON colors indicating the selected bank.
- To toggle between the 2 preset banks, press a PRESET BUTTON that is already illuminated.
- Presets 1-8 will illuminate the PRESET BUTTONS GREEN.
- Presets 9-16 will illuminate the PRESET BUTTONS AMBER.
The currently selected preset becomes your active Favorite preset. Your Favorite preset can be instantly recalled by pressing the FAVORITE footswitch while in reverb mode.
- Press FAVORITE to recall the currently selected Favorite setting which consists of all knob and button settings, Live Edit functions, expression control settings, Morph settings, and the current sequence. (GREEN FAVORITE LED On)
- Press FAVORITE again to return back to the settings of the physical controls on the pedal.
To select a new Favorite preset:
- Press any of the PRESET BUTTONS once to access the presets in the current bank.
- Press any of the PRESET BUTTONS twice to access the presets in the other bank.
To SAVE a new Favorite setting to any of the 16 on-board slots:
- First, dial in the desired setting with all of the knobs and buttons, and secondary functions.
- Press and hold the FAVORITE footswitch for a few seconds until the FAVORITE LED blinks BLUE.
- Then, press any one of the 8 PRESET BUTTONS once to select that preset in the current bank.
- Press twice to select the preset location in the other bank.
- If using MIDI to recall presets, you can send a MIDI Program Change message to NightSky while the FAVORITE LED blinks blue to save the preset to the location that corresponds with the MIDI Program Change message that is received.
Recalling Presets via MIDI
If you are controlling NightSky via MIDI, you have access to 300 presets available via MIDI Program Change through either the 5-pin DIN MIDI IN port, the USB-mini port, or through the EXP jack set to PRESET mode. This power-up mode for the EXP jack will accept MIDI Program Change messages to recall presets on NightSky on the MIDI Channel that the pedal is set to.
How to Set the EXP Jack to Accept 1/4″ MIDI
- Before powering up, press and hold down the FREEZE footswitch.
- While still holding down the FREEZE footswitch, plug in the power. Continue holding down the FREEZE footswitch until until the 3 footswitch LEDs and PRESET BUTTONS 1-6 all light up.
- Release the footswitch and turn the REVERB knob to select MIDI mode (BLUE FREEZE LED).
- Press any of the footswitches to store this setting and begin using NightSky.
How to Set the MIDI Channel
- Before powering up, press and hold down the FREEZE footswitch.
- While still holding down the FREEZE footswitch, plug in the power. Continue holding down the FREEZE footswitch until until the 3 footswitch LEDs and PRESET BUTTONS 1-6 all light up.
- Release the footswitch and turn the SPEED knob to select the desired MIDI Channel:
- Channel 1 – GREEN ON LED
- Channel 2 – AMBER ON LED
- Channel 3 – RED ON LED
- Channels 4-16 – Blinking BLUE ON LED
- When setting to Channels 4-16, you must send a MIDI Program Change message on the desired MIDI Channel (4-16) that you would like to control NightSky on while the ON LED is blinking BLUE. Once the MIDI Program Change message is received, the MIDI Channel will be set and NightSky will boot up for use.
Additional MIDI Control Information
NightSky contains 300 preset locations, numbered sequentially from 0-299. Because MIDI Program Change messages have a maximum number of 128 (0-127) the presets are grouped into three MIDI patch banks.
- MIDI BANK 0 = PRESETS 0-127
- MIDI BANK 1 = PRESETS 128-255
- MIDI BANK 2 = PRESETS 256-299
NightSky always powers up in MIDI Patch Bank 0, so if you plan to stay within the first 127 presets, simply send a standard MIDI Program Change message to load a preset.
- MIDI Program Change #’s 0-7 will illuminate the PRESET BUTTONS GREEN to correspond with presets 1-8.
- MIDI Program Change #’s 9-15 will illuminate the PRESET BUTTONS AMBER to correspond with presets 1-8.
- MIDI Program Change #’s 16-126 will NOT change the color of the PRESET BUTTONS, but it will change the color of the FAVORITE LED to AMBER.
If you will be using MIDI Banks 1 and/or 2, it is advisable to send a standard MIDI Bank Change message (MIDI CC# 0 with a value equal to the MIDI Bank#) before each MIDI Program Change message.
Sending MIDI CC# 0 with a value 0, MIDI Program Change #’s 0-15 will correspond to the 16 on-board Favorite presets accessible via the FAVORITE footswitch and the PRESET BUTTONS. Also, when in bank 0, MIDI PROGRAM CHANGE # 127 will put NightSky into Manual mode. In this mode, the pedal will be set to the current knob and button, settings. No preset data can be stored at this preset location.
What are the Live Edit functions on NightSky?
NightSky provides a way to adjust several settings that do not have a dedicated knob or button. Live Edit Functions are saved per preset.
PRE-DELAY
- Adjusts the time between the dry signal and the onset of the reverb.
- Press and hold the TEXTURE button and turn the REVERB knob to adjust
- (counter-clockwise = shorter PRE-DELAY, clockwise = longer PRE-DELAY).
GLIMMER GAIN
- Adjusts the sensitivity of the glimmer effect to the input signal.
- Press and hold the GLIMMER button and turn the REVERB knob to adjust.
DRIVE GAIN
- Adjusts the sensitivity of the drive effect.
- Press and hold the DRIVE button and turn the REVERB knob to adjust.
LOW PASS RESONANCE
- Adjusts the filter Q, or sharpness of the resonant frequency. Press and hold the FILTER button and turn the REVERB knob to adjust. Higher values result in a peaking response. Lower values create a gradual roll-off.
SCALE SELECT
- Selects one of eight scales that determine the quantization intervals of the SIZE/PITCH knob when QUANTIZE is set to scale mode.
- Press and hold the QUANTIZE button and press the PRESET BUTTON that corresponds with the scales noted below. The status will be shown by illuminated PRESET BUTTON.
- 1 = minor pentatonic
- 2 = major pentatonic
- 3 = major
- 4 = dorian
- 5 = minor blues
- 6 = harmonic minor
- 7 = whole tone
- 8 = diminished
SEQUENCE GLIDE
- Sequence Glide can be adjusted to add portamento to smooth the changes between the sequence steps.
- Press and hold the SHAPE button and turn the REVERB knob to adjust the amount of Sequence Glide.
Respond to MIDI CLOCK
- Determines whether NightSky’s sequencer will respond to MIDI Clock.
- Press and hold PRESET BUTTONS 1 & 4 and turn the SPEED knob. ON LED color will indicate the status.
- MIDI Clock Off = RED LED (default)
- MIDI Clock On = GREEN LED
MIDI EXPRESSION
- Allows you to send MIDI CC# 100 as a MIDI expression pedal.
- Press and hold PRESET BUTTONS 1 & 4 and turn the LOW CUT knob. ON LED color will indicate the status.
- MIDI Expression Off = RED LED (NightSky will not respond to MIDI expression CC# 100)
- MIDI Expression On = GREEN LED (NightSky will respond to MIDI expression CC# 100)
INFINITE INPUT
- Determines whether new audio received at the inputs will continue to be processed by the reverb while INFINITE is active.
- Press and hold the TARGET button and turn the REVERB knob. The status will be shown on PRESET BUTTON 1.
- Infinite Input On = GREEN LED (New audio is processed by the reverb while INFINITE is ON)
- Infinite Input Off = RED LED (New audio is not processed by the reverb while INFINITE is ON)
How to Adjust the Power Up Modes on NightSky
There are several Power Up Functions on NightSky that control various global parameters. All Power Up Function settings will persist through power cycles.
- To access the Power Up Functions:
- Before powering up, press and hold the INFINITE footswitch, then, plug in the power to the pedal.
- After a few seconds, all 3 footswitch LED’s and PRESET BUTTONS 1-6 will light up. You can release the footswitch.
While in this state, the buttons and knobs correspond to the different Power Up Functions:
- Bypass mode
- Press PRESET BUTTON 1, status shown on button LED
- True Bypass – GREEN (default)
- Buffered Bypass – RED – Preserves the high frequency response of your guitar signal through your pedal chain and long cable runs.
- Persist – Determine whether the reverb will have continue to trail when the pedal is bypassed or a new preset is loaded.
- Press PRESET BUTTON 2, status shown on button LED
- Persist On – GREEN Reverb in the buffer will persist when the pedal is bypassed or a new preset is loaded.
- Persist Off – RED (default) Reverb in the buffer will stop when the pedal is bypassed or a new preset is loaded.
- Send MIDI CC – Send MIDI CC messages to the MIDI outputs when a corresponding knob, button, or switch is used on the pedal.
- Press PRESET BUTTON 4, status shown on button LED
- Send MIDI CC On – GREEN
- Send MIDI CC Off – RED
- Send MIDI Program Change Out – Sends MIDI Program Change messages to the MIDI outputs when selecting a Favorite preset.
- Press PRESET BUTTON 5, status shown on button LED.
- Send MIDI Program Change On – GREEN
- Send MIDI Program Change Off – RED
- 5 Pin DIN MIDI Through Mode – Determines what type of MIDI data is sent by the MIDI OUT port.
- Press PRESET BUTTON 6, status shown on button LED.
- On – GREEN (default): Only MIDI messages generated by NightSky’s controls are sent to the MIDI OUT port.
- Through – RED: MIDI messages received at NightSky’s MIDI inputs are echoed to the MIDI OUT port without adding MIDI messages generated by the UI controls.
- Set MIDI Channel – Sets the MIDI channel that NightSky will communicate through.
- Turn the SPEED knob to select. The color of the ON LED indicates the selected MIDI channel.
- Channel 1 – GREEN
- Channel 2 – AMBER
- Channel 3 – RED
- Channel 4 – BLUE (blinking)
- With this option, you set the MIDI channel by sending the pedal a MIDI Program Change message on the desired MIDI channel you would like to set the pedal to. Once the MIDI PC message is received, the MIDI Channel will be set and the pedal will boot up for use.
- 1/4″ TRS MIDI OUTPUT Mode – Determines what type of MIDI data is sent by the MIDI output on the RING of a TRS cable connected to the EXP port set to MIDI mode.
- NOTE: If you are using the Strymon MIDI EXP Cable with NightSky, the TRS MIDI OUTPUT mode must be set to OFF.
- Turn the DECAY knob to select the mode. The status is shown on the FAVORITE LED.
- ON – GREEN: Only MIDI messages generated by NightSky are sent to the 1/4″ MIDI OUTPUT.
- THROUGH – AMBER: Incoming MIDI messages are sent to the 1/4″ MIDI OUTPUT without additional MIDI messages generated by NightSky.
- OFF – RED (default): No MIDI messages are sent out of NightSky’s 1/4″ MIDI OUTPUT.
- How do I use the Morph feature on NightSky?
The Morph function allows NightSky to sweep between the current sound of the pedal and a set of alternate knob settings and back.
- In reverb mode, press and hold the ON footswitch to sweep the knobs to the morph settings.
- Release the ON footswitch to return back to the current parameter settings of the pedal.
Setting Up Morph Parameters
- Press and hold PRESET BUTTONS 2 & 7 together to enter Morph setup mode.
- Adjust the knobs to the desired Morph setting.
- Press any PRESET BUTTON to exit Morph setup mode.
- Morph Speed sets the amount of time it takes to arrive at the Morph setting. Press and hold the ON footswitch and turn the REVERB knob to adjust the Morph Speed.
- Adjust the knobs back to the desired sound.
- Press and hold the ON footswitch to sweep between the current setting and the Morph setting. Release the ON footswitch to return to the current setting of the pedal.
NOTE: Morph parameter settings are saved independently per preset.
How to use an expression pedal to control the knobs on NightSky?
You can set the EXP jack on NightSky to accept an expression pedal for real-time control over any one or more of the knobs in any direction.
To set the EXP jack to Expression mode:
- Press and hold down the INFINITE footswitch while connecting power to the pedal.
- Once all three LEDs and PRESET BUTTONS 1-6 light up on the pedal, release the footswitch.
- Turn the REVERB knob counter-clockwise and the ON LED will light up GREEN to indicate Expression mode.
- Press the INFINITE footswitch to exit and store the EXP jack setting.
NOTE: EXP jack assignment persists through power cycles.
To assign knobs to be controlled with the expression pedal:
- Connect an expression pedal to the EXP jack of NightSky using a TRS cable.
- Press and hold down PRESET BUTTONS 1 & 8 until all eight PRESET BUTTONS blink GREEN.
- Rock the expression pedal to the HEEL position and PRESET BUTTONS 1-4 will blink GREEN.
- Set the knob(s) you would like to control to the desired settings for the HEEL position of the expression pedal. PRESET BUTTONS 1-4 will blink RED.
- Rock the expression pedal to the TOE position. Now, PRESET BUTTONS 5-8 will blink GREEN.
- Set the knob(s) you would like to control to the desired position you would like for the TOE position of the expression pedal. PRESET BUTTONS 5-8 will blink RED.
- When you are done, press any of the PRESET BUTTONS to save this assignment.
Make sure to save your presets after assigning the expression pedal to save the assignment to your presets. We recommend using an expression pedal with a 25k Ohm minimum potentiometer.
NOTE: Expression pedal assignment is saved independently per Favorite/MIDI preset.
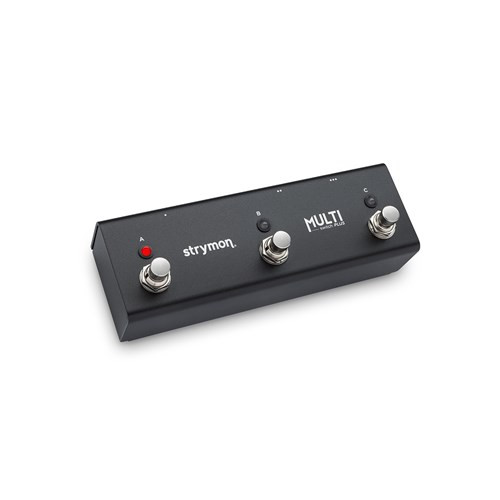
How can I use MultiSwitch Plus with NightSky?
There are several modes to use with MultiSwitch Plus for expanded control over NightSky. First you must set the EXP jack NightSky for the desired operation.
To configure NightSky for use with MultiSwitch Plus:
- Press and hold the INFINITE footswitch while connecting power to the pedal. Once the three footswitch LEDs and PRESET BUTTONS 1-6 light up, release the footswitch.
- Turn the SPEED knob all the way counter-clockwise to set the MIDI channel to Channel 1. The ON LED should be GREEN.
- Turn the LENGTH knob all the way counter-clockwise to set the TRS MIDI OUT mode to ON. The FAVORITE LED should be GREEN.
- Turn the REVERB knob to select the desired MultiSwitch Plus mode which will be displayed on the INFINITE LED.
- MIDI/3 Preset Mode (BLUE LED): Allows access to three of the on-board presets on NightSky using the three footswitches on MultiSwitch Plus.
- The three presets correspond to presets 2, 3, and 4 of the first preset bank.
- PRESET SCROLL Mode (RED LED): Scroll up and down the 16 on-board presets using the outer 2 footswitches on MultiSwitch Plus while the middle footswitch toggles the bypass of NightSky.
- MOD/TONE/VOICE Bypass Mode (WHITE LED): Use MultiSwitch Plus to independently bypass the MOD, TONE, and VOICE sections of NightSky.
- Press the INFINITE footswitch to store the EXP jack mode and begin using NightSky.
Then, set MultiSwitch Plus for the correct mode of operation:
- MIDI/PRESET Mode: Press and hold the A footswitch while connecting MultiSwitch Plus to the EXP jack on NightSky. The A footswitch LED will blink RED a few times while holding the switch down, then, all three footswitch LEDs will blink GREEN when released.
- PRESET Scroll and MOD/TONE/VOICE Bypass Modes: Press and hold the C footswitch while connecting MultiSwitch Plus to the EXP jack on NightSky. The C footswitch LED will blink RED a few times while holding the switch down, then, all three footswitch LEDs will blink GREEN when released.
NOTE: If NightSky is in Sequence mode, loading a new preset will stop the sequence and cause the pedal to switch to Reverb mode.
NOTE: In MOD/TONE/VOICE Bypass Mode, the LEDs for each section will turn off when it is bypassed. These bypass settings can be saved to a preset, however, the LEDs for all sections will be lit when you recall the preset regardless of the bypass state.
How do I use Sequence mode on NightSky?
NightSky has a built-in eight step sequencer where each step can have an independent SIZE/PITCH parameter setting for creating rhythmical pitch patterns with the currently loaded reverb settings. The sequence can be stepped through manually with the ON (sequence step) footswitch, or it can run continuously at the tempo set by using the FAVORITE (sequence tap) footswitch. Sequences are saved per preset.
- To enter Sequence mode, press and hold the INFINITE (sequence) footswitch until the ON LED turns RED.
- The PRESET BUTTONS now become sequence steps 1 through 8 with an AMBER button indicating that the step is active. A dark PRESET BUTTON indicates that the step is not active.
- NOTE: An unlit PRESET BUTTON will be skipped over and does not indicate a rest.
![]()
Programming a Sequence
- Enter Sequence mode.
- It is helpful to have audio in the reverb buffer while you program the sequence. This can be done by playing audio through the pedal or holding the audio using the INFINITE footswitch.
- Press a PRESET BUTTON to enable (AMBER button LED) or disable (button LED OFF) the sequence step. A maximum of eight steps can be active for the sequence.
- Press and hold a PRESET BUTTON and turn the SIZE/PITCH knob to set the desired pitch for each sequence step.
- TIP: Try setting QUANTIZE to half step or scale for more harmonious sequences.
Running the Sequence
- Tap a tempo using the FAVORITE (sequence tap) footswitch to run the sequencer at the rate of the tapped tempo. A PRESET BUTTON LED will illuminate RED to indicate the current step.
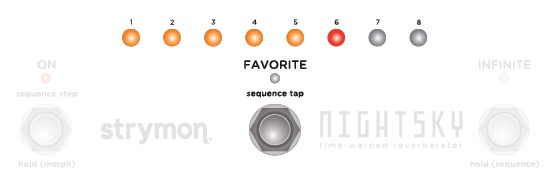
- NOTE: The maximum step length is 2000ms and will automatically run if a second tap is not entered before the maximum step length.
- NOTE: A single press of the FAVORITE (sequence tap) footswitch resets the sequencer to run from step 1 if the sequencer is already running. If NightSky is receiving MIDI clock, a single press will run the sequence.
Sequence Glide
Sequence Glide can be adjusted to add portamento to smooth the changes between the sequence steps.
- Press and hold the SHAPE button and turn the REVERB knob to adjust the amount of Sequence Glide.
- NOTE: Sequence Glide applies to all steps.
Manual Step Mode
- Press the ON (sequence step) footswitch to advance the sequence to the next step with each press. A PRESET BUTTON LED will illuminate RED to indicate the current step.
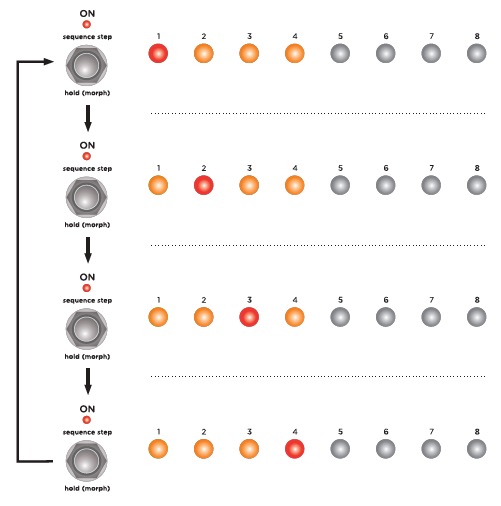
- NOTE: If the sequencer is running, pressing the ON (sequence step) footswitch once will stop the sequence and return to the first step.
- How can I control NightSky with MIDI?
MIDI Connections to NightSky
To begin using NightSky with an external MIDI device, connect the MIDI OUT from another pedal, controller, or computer interface to the MIDI IN or EXP jack on NightSky set to MIDI mode. The following devices can be used to send MIDI messages to NightSky:
- Strymon MIDI EXP cable (link)
- USB connection from your computer to NightSky
- Standard 5-pin DIN MIDI connection
- Compatible 5-pin MIDI to 1⁄4” MIDI Interface:
- Empress Effects – MIDIbox2
- Chase Bliss MIDIbox
Configuring NightSky to Use MIDI via the EXP Jack
Set EXP jack to MIDI Mode
Once you have connected NightSky to a MIDI source, you must set the EXP jack to MIDI mode.
- Press and hold the INFINITE footswitch while connecting the pedal to power.
- When the LEDs light up, release the footswitch and turn the REVERB knob until the INFINITE LED turns BLUE.
- Press the INFINITE footswitch to store the EXP jack assignment.
Set MIDI Channel
Next, you will need to select a MIDI channel to communicate with NightSky. NightSky is set to MIDI channel 1 by default.
- Press and hold the INFINITE footswitch while connecting the pedal to power.
- When the LEDs light up, release the footswitch and turn the SPEED knob to set the MIDI channel. The ON LED will change color as the MIDI Channel is changed:
- GREEN – MIDI Channel 1
- AMBER – MIDI Channel 2
- RED – MIDI Channel 3
- BLUE – MIDI Channels 4-16
- This setting requires a 1/4″ MIDI connection to set. Once the LED turns BLUE, it will blink until the pedal receives a MIDI Program Change message. Once a MIDI PC message is received, the pedal will be set to the MIDI channel that the message was sent through and the LED will stop blinking.
- Press the INFINITE footswitch again to store the MIDI channel assignment and begin using NightSky
Set MIDI Output Mode for the EXP Jack
The MIDI Output mode must be set to determine what kind of MIDI data is sent out by NightSky. ***NOTE: If you are only sending MIDI data to NightSky or if you are using the Strymon MIDI EXP cable, the MIDI Output mode must be set to OFF.***
- Press and hold the INFINITE footswitch while connecting the pedal to power.
- When the LEDs light up, release the footswitch and turn the DECAY knob to select what kind of MIDI data is sent from NightSky to other MIDI devices. The FAV LED will show the status:
- GREEN – ON (default)- Using NightSky knobs and switches generates MIDI messages that are sent out of NightSky.
- AMBER – THROUGH – Incoming MIDI messages are sent out of NightSky without any additional MIDI messages generated by NightSky.
- RED – OFF – No MIDI messages are sent out of NightSky.
Saving and Recalling Presets on NightSky with MIDI
Saving Presets via MIDI
When using MIDI, the currently loaded settings on the pedal can be saved to any of NightSky’s 300 preset locations at any time.
- To initiate the SAVE process, press and hold the FAV footswitch. The FAV LED will start blinking BLUE.
- Send a MIDI Program Change message from your connected MIDI device to NightSky. The LED will stop flashing and NightSky will save the settings to the preset location that corresponds with the MIDI Program Change message it received.
- To save a preset to the currently loaded preset location, simply press the FAV footswitch once again while the LED is flashing.
Recalling Presets
- To recall presets on NightSky, send the pedal a MIDI Program Change message on the same channel the pedal is set to that corresponds to the desired preset you would like to recall.
NightSky contains 300 preset locations, numbered sequentially from 0-299. Because MIDI Program Change messages have a maximum number of 128 (0-127) the presets are grouped into three MIDI patch banks:
- MIDI BANK 0 = PRESETS 0-127
- MIDI BANK 1 = PRESETS 128-255
- MIDI BANK 2 = PRESETS 256-299
NightSky always powers up in MIDI Patch Bank 0, so if you plan to stay within the first 127 presets, simply send a standard MIDI Program Change message to load a preset.
- MIDI Program Change #’s 0-7 will illuminate the PRESET BUTTONS GREEN to correspond with presets 1-8.
- MIDI Program Change #’s 9-15 will illuminate the PRESET BUTTONS AMBER to correspond with presets 1-8.
- MIDI Program Change #’s 16-126 will NOT change the color of the PRESET BUTTONS, but it will change the color of the FAVORITE LED to AMBER.
If you will be using MIDI Banks 1 and/or 2, it is advisable to send a standard MIDI Bank Change message (MIDI CC# 0 with a value equal to the MIDI Bank#) before each MIDI Program Change.
Selecting bank 0, patch 127 will put NightSky into Manual mode. In this mode, the pedal will be set to the current knob and switch settings. No preset data can be stored at this preset location.
How to Sync the NightSky Sequencer to MIDI Clock
On NightSky, you can synchronize the sequencer’s playback tempo to MIDI clock that is received from any of the MIDI inputs:
- 5-PIN DIN MIDI IN port
- 1/4″ TRS MIDI IN at the EXP jack set to MIDI mode
- USB input
To set NightSky to respond to MIDI clock:
- Press and hold down PRESET BUTTONS 1 and 4.
- While holding down the buttons, turn the SPEED knob to adjust whether the NightSky sequencer will respond to MIDI clock; the status is shown on the ON LED:
- Off (Turn LEFT) = RED LED (default)
- On (Turn RIGHT) = GREEN LED
If NightSky is in Sequence mode and is responding to MIDI Clock, the sequence will run as soon as you tap the FAVORITE footswitch.
Additional Tips
- NightSky’s response MIDI Clock can be saved independently per preset. Make sure to set this parameter to ON and save each preset you would like the sequencer to respond to MIDI Clock.
- No other parameters respond to MIDI Clock on NightSky.
What are the hardware specifications on NightSky?
Dry Signal: Analog Dry Path
Input Impedance: 1M Ohm
Output Impedance: 100 Ohm
Input: 1/4″ TS (unbalanced)
Outputs: 1/4″ TS (unbalanced)
A/D & D/A: 24-bit 96kHz
Max Input Level: +8dBu
Frequency Response: 20Hz to 20kHz
Signal to Noise: 115dB typical
DSP Performance: 1585 MegaFLOPS
Bypass Switching: True Bypass (electromechanical relay switching); optional Buffered Bypass or when using Stereo output
Dimensions: 4.5” deep x 7” wide x 2.5” tall (11.4 cm deep x 17.8 cm wide x 6.0 cm tall)
Power requirements: 9VDC center negative; 300mA minimum
How do I perform a factory reset on NightSky?
A factory reset will reset all custom presets, power up functions, and secondary parameters back to factory settings.
- To perform the Factory Reset:
- Before powering up, press and hold the ON footswitch, then, plug in the power to the pedal.
- After a few seconds, PRESET BUTTONS 1-4 will be lit AMBER and PRESET BUTTONS 5-8 will be l
- What are the power supply requirements for NightSky?
We recommend a power supply that provides 9VDC (center negative) with a minimum 300mA of current.
Do not subject your Strymon pedal to any voltage above 9V. Doing so will damage your pedal and void your warranty.
What are the power supply requirements for NightSky?
We recommend a power supply that provides 9VDC (center negative) with a minimum 300mA of current.
Do not subject your Strymon pedal to any voltage above 9V. Doing so will damage your pedal and void your warranty.
it GREEN. The ON footswitch will be blinking RED. You can release the footswitch.
- While in this state:
- Sweep the DECAY knob from 0% to 100% twice.
- Status shown on FAVORITE LED with it lighting up at the 0% (AMBER) and 100% (RED) extremes.
- When the reset is initiated, all 3 footswitch LEDs will be blinking RED.
- When the footswitches stop blinking, the pedal will power cycle and start up as normal.
- Do Strymon pedals include power supplies?
All Strymon pedals sold within North America (except OB.1) include a 9VDC 660mA power supply. OB.1 includes a 9V battery.

