Product Description
Sunset - Dual Overdrive Peda
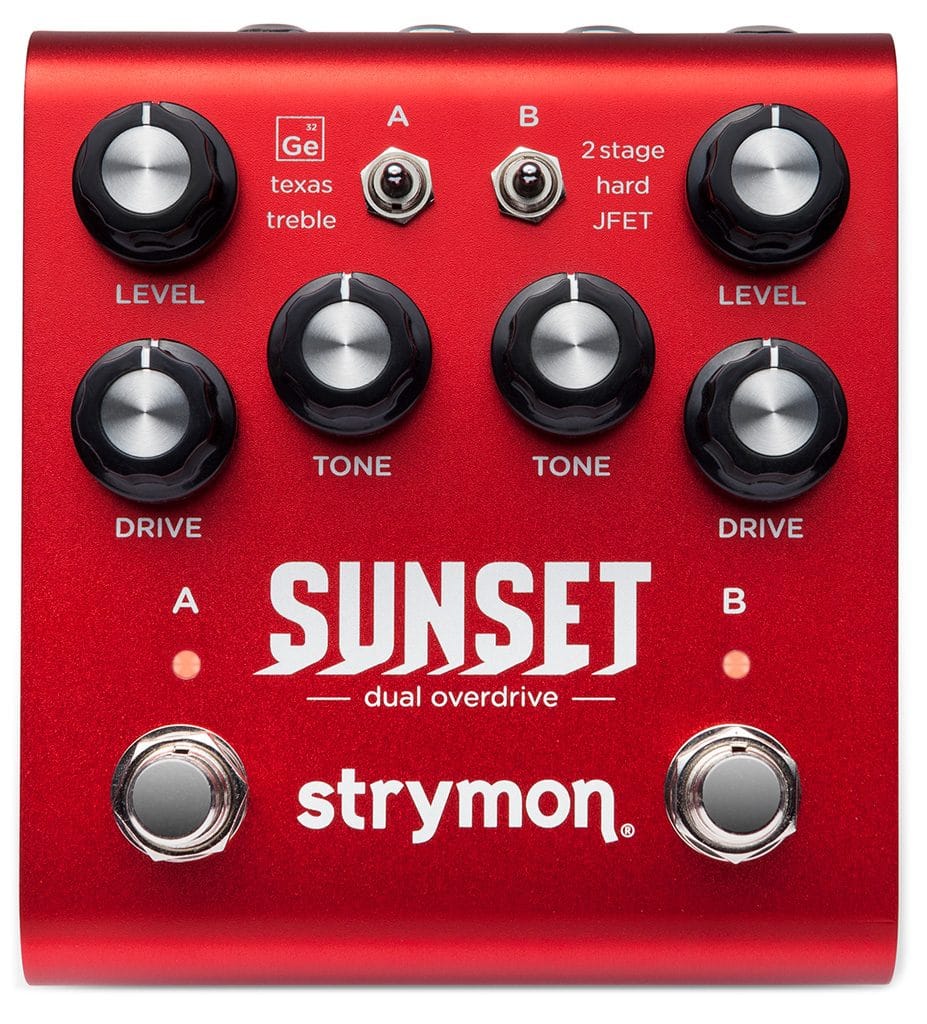
Classic overdrive sound, x2.
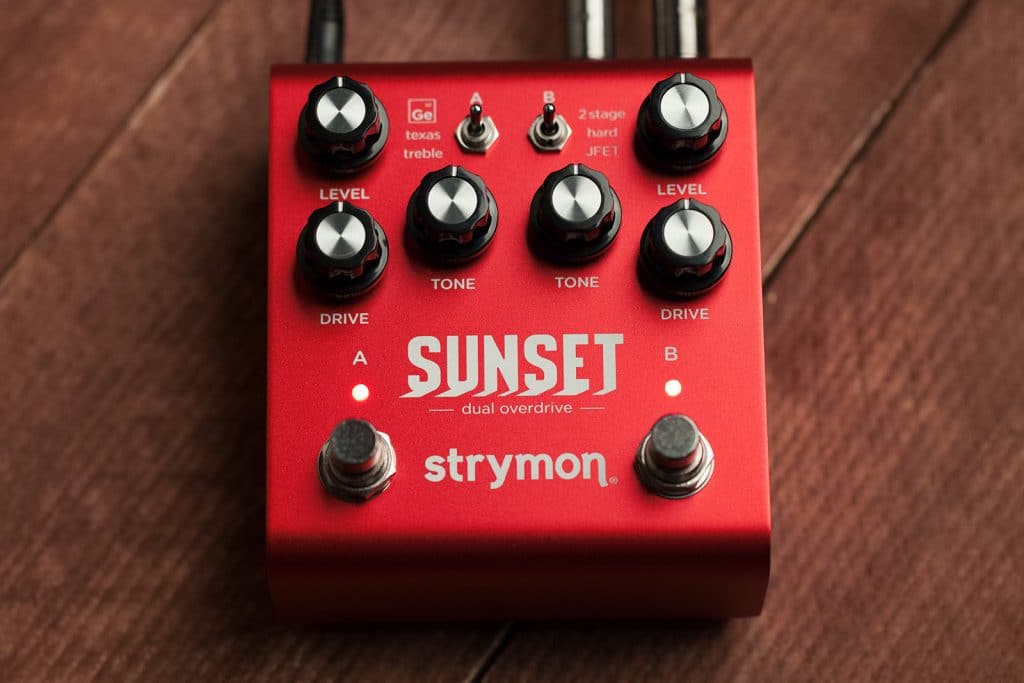
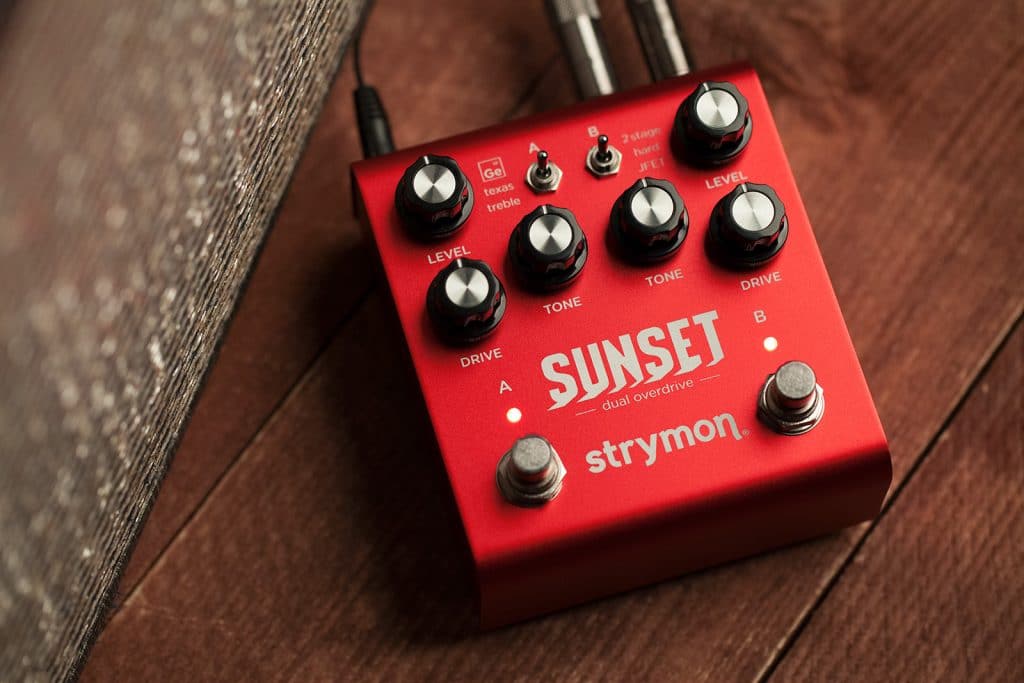
Sunset gives you the best of the best classic overdrive circuits, custom voiced for instantly gratifying control over a huge range of sought-after tones. We studied six circuit types found in many truly timeless and iconic overdrive and boost pedals, and put our takes on all six of them into a single two-channel unit.
Two pedals at once.
Sunset is really two customizable overdrive pedals, independently selectable and flexibly routable, designed and voiced for complementary tones when stacked. Six distinct circuits each feel and react differently in your hands, two at once, all in one convenient package. Push your amp any way you want, from transparent “more amp” to heavy saturated fuzz, and all the best places in between.
Holy Grail tone, minus the quest.
We are all familiar with the endless search for the ultimate overdrive pedal and the perfect tone. We did the critical listening and custom voicing to design each side of Sunset with just one tone knob, so you can quickly dial in the sound you want. The knob ranges for each circuit type are custom calibrated to provide maximal usable control. We applied the same design philosophy and care to the stacking options, ensuring each combination interacts optimally and sounds great, so a huge range of classic overdrive tones are instantly achievable.
Six classic circuits.
Sunset utilizes an all-analog JFET gain stage coupled with custom-voiced, precision-crafted DSP algorithms to capture the nuances and character of each circuit type.
Channel A overdrive circuits
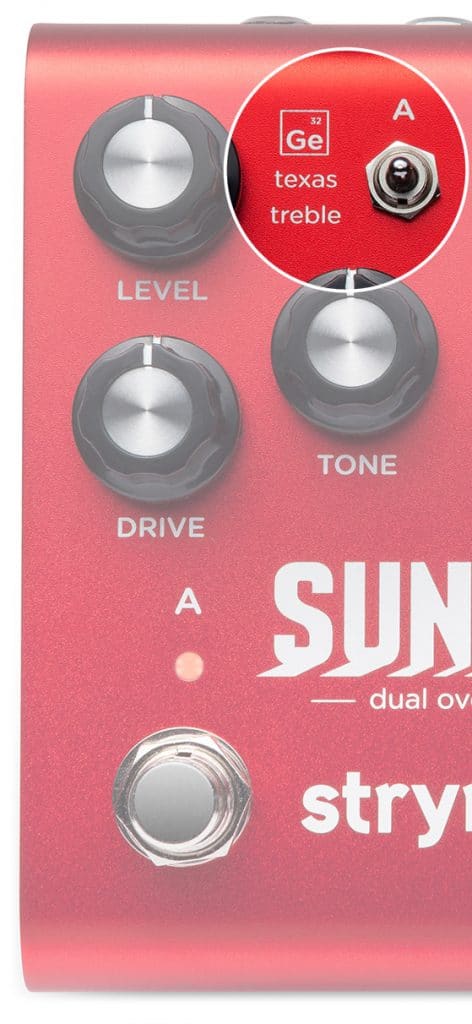
The Ge overdrive combines the softer response of germanium diodes with a parallel path that blends in the dry signal as the Drive is lowered. At higher gains the lower-mid range frequencies are emphasized to create a tight, thick response. This overdrive really fattens up single coil pickups, and responds with a bold push when paired with humbuckers.
The Texas overdrive employs a single stage soft-clipper configuration that is filtered before and after the gain stage to create a smooth and dynamic overdrive. The original signal dynamics are retained as the gain is increased – perfect for playing the blues or just fattening up your sound with a signature mid range bump.
Channel A boost circuit
The Treble type is a treble booster that removes the low frequencies as the Tone knob is turned up – great for tightening up an overdriven amp, or driving another gain pedal that’s a bit looser on the low end. Turning the Tone knob down brings in the low end, making for a versatile all-around boost.
Channel B overdrive circuits
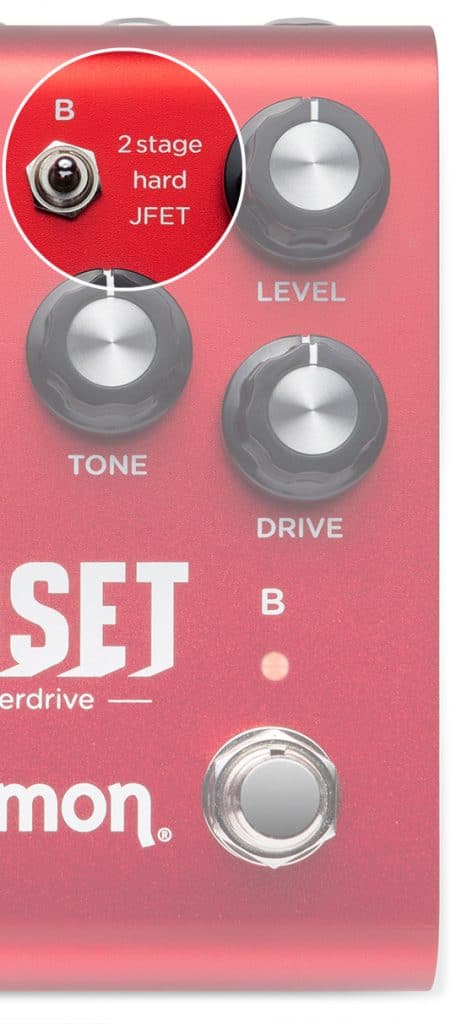
The 2stage overdrive combines a soft-clipping stage followed by a hard-clipping stage, creating a complex overdrive with a wide range of gain. Its EQ structure preserves the low end while adding some muscle to push your amp. This overdrive can easily take you from lightly clipped to beefy saturation.
The Hard overdrive uses a single-stage hard-clipping circuit that has a ton of available gain, approaching fuzz territory with the Drive knob maxed. At lower gains, mildly clipped transparent tones are achieved with this versatile drive. The wide-ranging Tone knob lets you shape the top end from smooth to buzzy.
Channel B boost circuit
The JFET type is a clean boost that subtly beefs up your signal with the dynamics and responsiveness created from the JFET front end. As you turn up the drive, the signal gets rounded and warmer. This is a great option when your amp just “needs a little extra.”
Optimized Stacking.
Since the time when overdrives were created to simply push an amp in order to achieve an overdriven sound even at sane volume levels, players have evolved to want more layered, multistage tonalities. Stacking gives you more flexibility and tone range on the floor. You can find an overdrive that sounds good on its own, then run it through a second drive to add new dimensions to your tone. Sunset allows you to use any of its six overdrive circuits on their own, or route the Channel A drive circuit through Channel B, or Channel B through Channel A, or use two circuits in parallel. Routing options have been chosen deliberately to present the best-sounding combinations of drive circuits. Sunset eliminates the guesswork.
Tone Adjustment and Shaping
Digital or analog? We chose both.
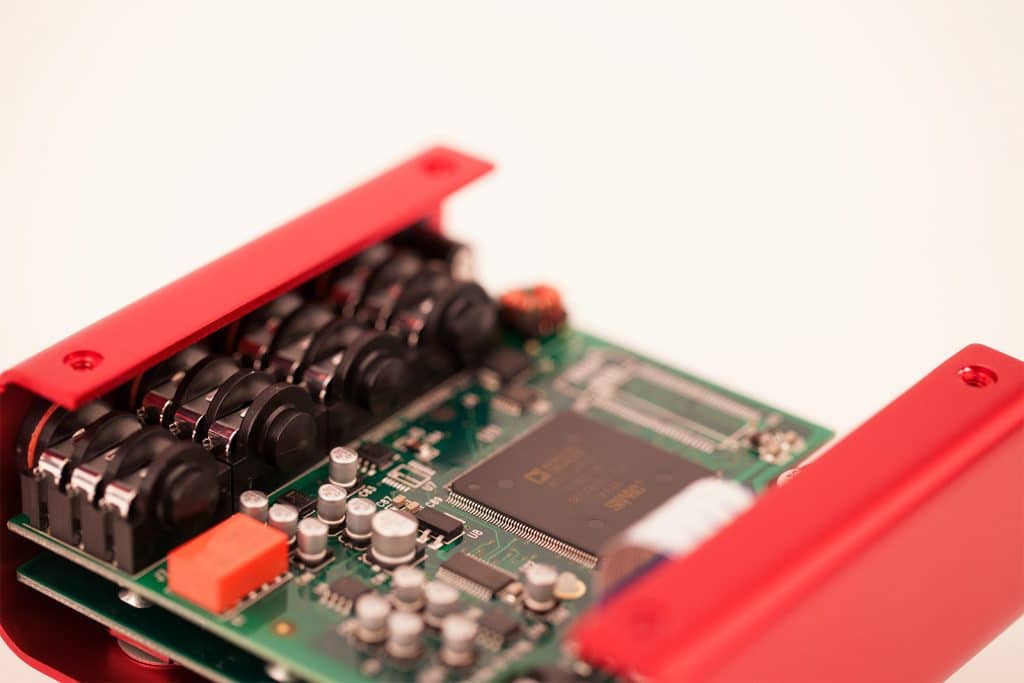
Sunset’s input features an ultra low noise, discrete, class-A JFET circuit providing up to 20dB of pure analog gain. With our hybrid approach you get the best of both analog and digital worlds: The JFET stage provides exceptional touch sensitivity and dynamic interaction with your guitar, while the incredibly powerful SHARC DSP facilitates the great level of detailed complexity and responsiveness you’ll want to hear.
Configure your drive stack.
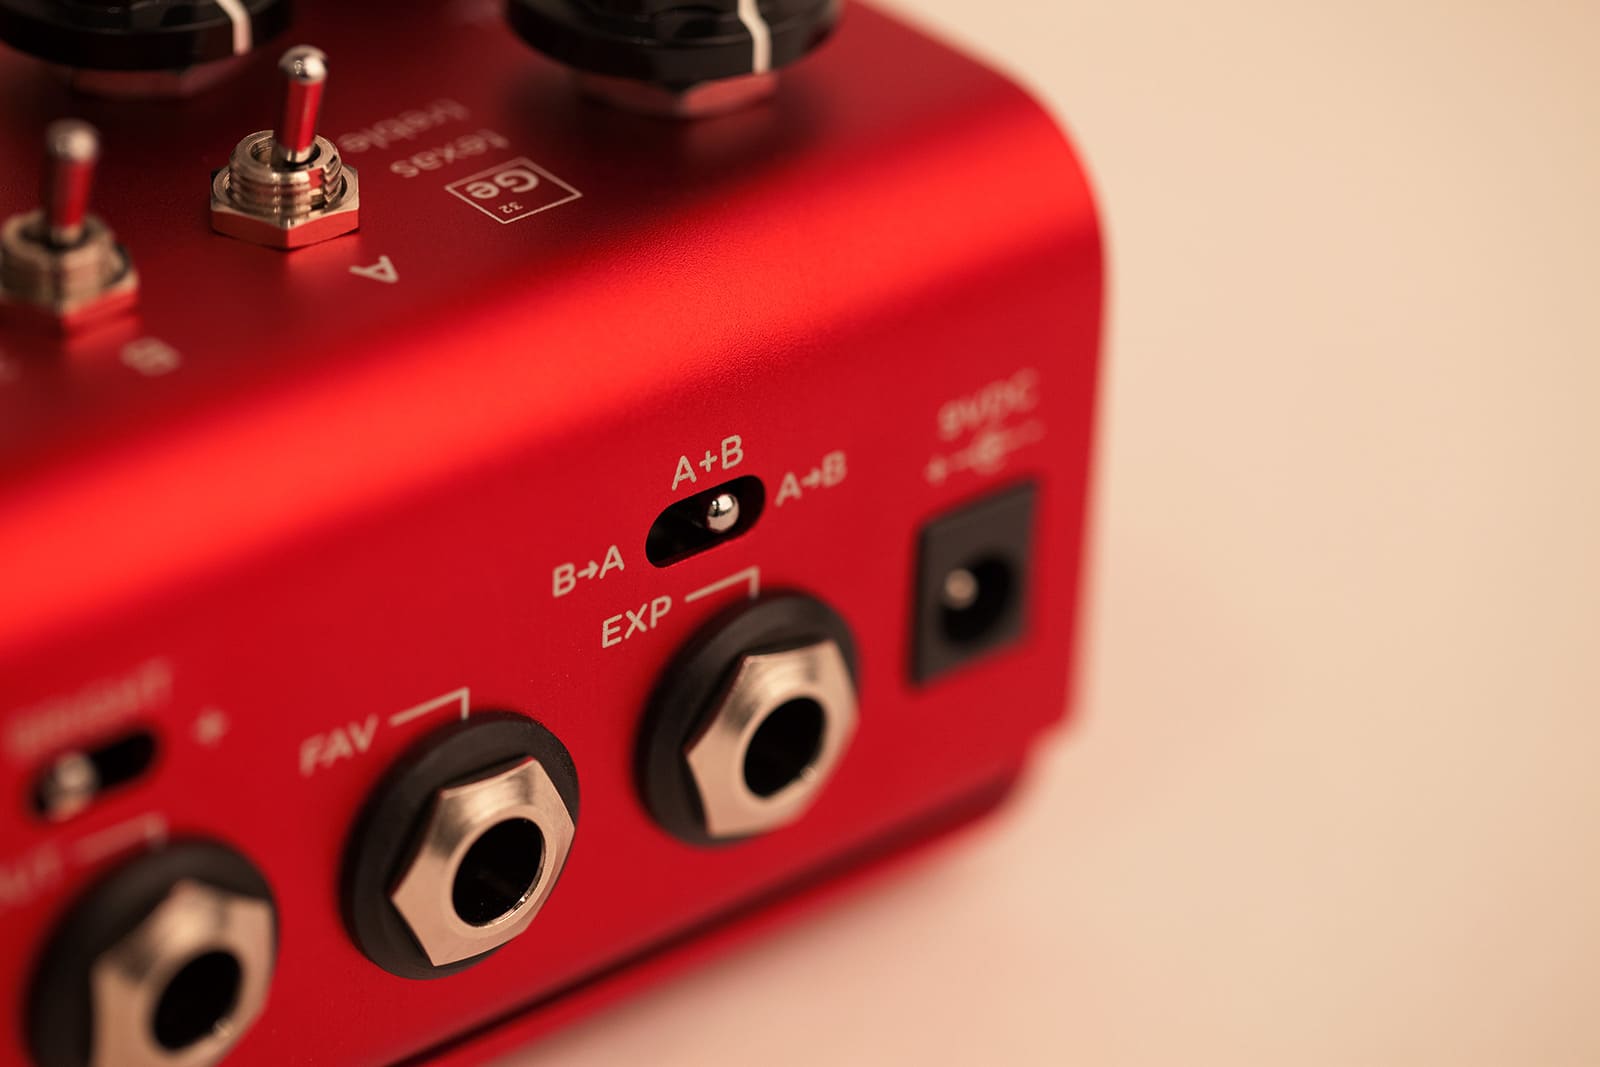
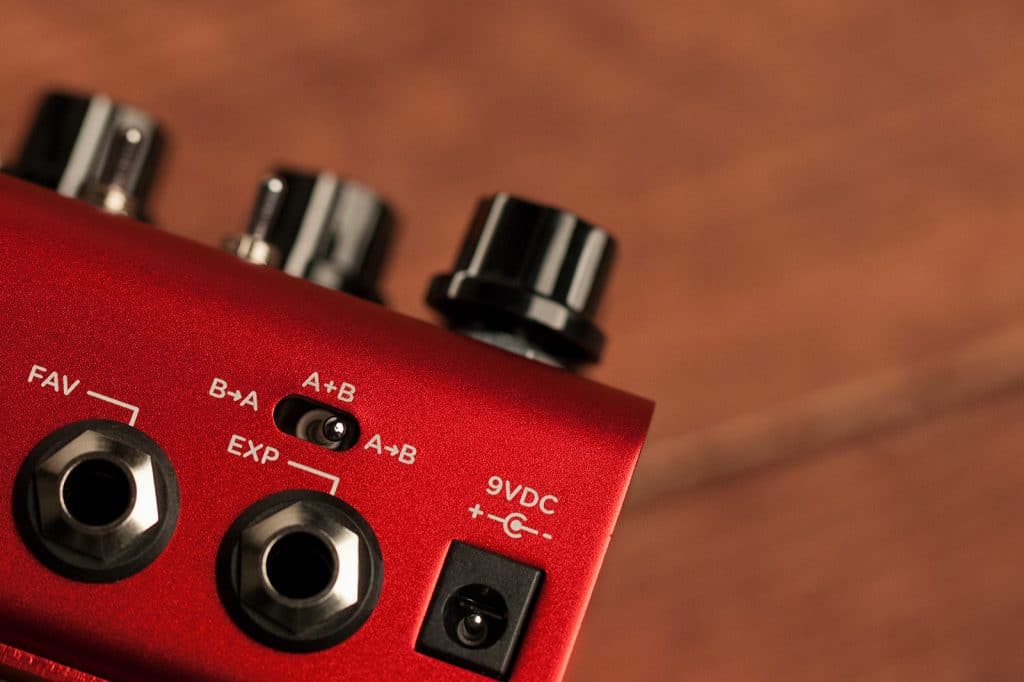
Sunset’s three-position Config switch gives you powerful control over signal flow when you stack two drive circuits. You can run whichever two drive circuits you choose in series, reverse series, or parallel, all with the flip of a switch and no recabling. Coming up with great sounding drive and signal flow combinations is fast and easy.
Specs
Sound Design
- Six drive circuit topologies with custom tuned voicing for each drive type
- Precision crafted drive circuits stackable in multiple combinations for a wide variety of complex, responsive tones.
- Analog class A JFET input gain stage maximizes headroom while adding up to 20dB of pure analog gain
- Drive and Tone control ranges optimized for each circuit topology
- Series, reverse series, and parallel drive circuit stacking via Config switch
- Bright switch to tailor the sound for use with all amplifiers from dark to bright
- Optional variable-threshold noise reduction for taming noisy guitar pickups
Ins, Outs, Switches
- High impedance mono input
- Mono output
- Favorite Input to connect an external MiniSwitch to recall a Favorite preset
- Expression pedal input allows the connection an expression pedal for simultaneous morphing control over multiple parameters (Expression mode), or logarithmic taper for smooth volume control (Volume mode)
- MIDI accessible via Expression jack for remote parameter control and access to 300 preset locations
Audio Quality
- Ultra low noise, high performance 24-bit 96kHz A/D and D/A converters provide uncompromising audio quality
- Premium analog front end and output section
- Super high performance SHARC DSP in a compact form factor
- 32-bit floating point processing
More
- True Bypass (electromechanical relay switching) or selectable transparent Analog Buffered Bypass
- Strong and lightweight anodized red aluminum chassis
- 9V DC power supply included
- Power requirements: maximum 9 volts DC center-negative, with a minimum of 250mA of current
- Dimensions:
- 4.5″ deep x 4″ wide x 1.75″ tall
- 11.4 cm deep x 10.2 cm wide x 4.4 cm tall
- Designed and built in the USA
All Strymon pedals are Designed and Built in the USA.
How can I recall a Favorite setting on Sunset?
You can connect an external MiniSwitch to Sunset’s FAV Input to save and recall a single Favorite preset setting that provides access to another set of sounds for both A and B channels. This provides you with A, B, and A+B sounds for your non-Favorite setting, and a separate set of A, B, and A+B sounds for your Favorite setting to get 6 different sounds. On Sunset, the bypass state of each side (A and B) will also be stored in the Favorite preset.
- First, connect an external MiniSwitch to the FAV Input on Sunset with a TRS stereo cable.
- Then, dial in the settings you would like to store as your favorite preset with the knobs and switches of the pedal.
- The Favorite preset will also save the bypass state of each side of Sunset along with the setting of the NOISE REDUCTION so you can have independent noise gates for both the Favorite and manual settings of the pedal.
- Once you have the pedal set the way you like, press and hold down the A footswitch for about 3 seconds to store the setting.
- Your Favorite setting will be stored for all future power ups until you save a new Favorite following the steps above.
How can I set Sunset’s noise reduction?
Sunset has an optional, variable-threshold noise reduction feature to tame hum, buzz, and system noise when you’re not playing. To use the noise reduction:
- Press and hold the B footswitch for a few seconds until the A LED blinks.
- Release the B footswitch and turn the A channel LEVEL knob past the 12 o’clock position to engage the Noise Reduction. The A channel LED will change from GREEN to AMBER at the 12 o’clock position to indicate the Noise Reduction has been engaged.
- Turning the A channel LEVEL knob past 12 o’clock increases the Noise Reduction threshold for louder and noisier setups. The A channel LED will change from AMBER to RED to indicate the increased Noise Reduction threshold level.
- Press the A or B channel footswitches to store the new Noise Reduction setting to the Sunset.
NOTE: The Noise Reduction setting can be saved independently for the Favorite preset and manual settings on Sunset. To do this, set the Noise Reduction level before saving your Favorite preset. Once your Favorite preset has been saved, change the Noise Reduction setting to work with your manual setting.
How can I use Sunset’s Volume mode?
You can control the overall output volume of Sunset with a connected expression pedal by setting the pedal to Volume Mode. In this mode, the expression pedal will control the volume with a logarithmic audio taper for smooth control over the output signal.
- First, connect your expression pedal to the EXP jack on Sunset with a TRS cable.
- To set the EXP jack to operate in Volume mode, press and hold the A channel footswitch at power up while plugging in the power to Sunset. Both the A and B channel LEDs will start blinking.
- Release the footswitch and turn the B channel LEVEL knob to the 12 o’clock position.
- Press the ON or FAVORITE footswitches to store this setting and use Sunset.
In Volume mode, the A and B channel LEVEL knob sets the highest volume level for the TOE down position of the expression pedal. Also, the highest TOE down position of the expression pedal will correspond to the setting that the A and B channel LEVEL knob was saved to for the Favorite setting.
NOTE: A connected expression pedal will still control the volume output even when Riverside is bypassed if the pedal is set to buffered bypass mode.
How can I use an expression pedal to control Sunset?
You can use a TRS expression pedal to control as many of Sunset’s knobs as you like, in any direction, throughout their range.
- First, connect your expression pedal to the EXP jack on Sunset with a TRS cable.
- At power up, press and hold the A channel footswitch while plugging in the power to Sunset and both the A and B channel LEDs will blink.
- Release the footswitch and turn the B channel LEVEL knob to the LEFT of the knob range so that the ON LED lights up GREEN.
- Press the A or B channel footswitches to store this setting and use Sunset.
To assign which knobs to control with the expression pedal:
- Once Sunset is powered up, press and hold down both A and B channel footswitches for a few seconds until both LEDs begin blinking green.
- Rock the expression pedal back to the HEEL down position and only the A channel LED will be blinking.
- Set the knobs the way you would like them to be in the HEEL down position of the expression pedal. The B channel LED will turn red to indicate that the setting has been adjusted.
- Rock the expression pedal forward to the TOE down position and only the B channel LED will be blinking.
- Set the knobs you would like to control to the setting for the TOE down position of the expression pedal. The B channel LED will turn red to indicate that the setting has been adjusted.
- Press the A or B channel footswitches once to save the expression settings.
NOTE: Expression pedal settings are global and will affect both the Favorite preset and manual settings on Sunset.
How do I change the bypass mode on Sunset?
Sunset can be set to operate in either True Bypass (electro-mechanical relay) or Buffered Bypass modes.
Setting Sunset to buffered bypass mode preserves the high frequency response of your guitar signal through your pedal chain and long cable runs. You can also use the Volume pedal mode even if Sunset is bypassed when set to Buffered Bypass mode.
- At power up, press and hold the B channel footswitch while plugging in the power to Sunset. Both the A and B channel LEDs will blink.
- Release the footswitch and turn the B channel LEVEL knob to the LEFT (GREEN LED) for True Bypass or turn the knob to the RIGHT (RED LED) for Buffered Bypass.
- Once the Bypass mode has been set, press the A or B channel footswitches to save this setting and begin using Sunset.
The Bypass mode is saved for all future power-ups until it is changed again following the same steps.
How do I set the Bright switch on Sunset?
Sunset’s BRIGHT switch tailors the highest frequencies of the pedal’s output signal for connecting to a wide variety of amplifiers with different tone characteristics.
- The minus (-) position provides a smooth top end to Sunset’s output.
- The center provides a balanced sound with most setups.
- Try using the plus (+) position to cut through with a warm amp/speaker setup.
How can I control Sunset with MIDI?
***In order to control Sunset with MIDI, it must have firmware version 1.20 or later. An easy way to check if your Sunset is running version 1.20 or newer firmware is to try setting the MIDI Expression functionality.
- When Sunset is already powered up, press and hold down the B footswitch until the LEDs begin to blink.
- Release the footswitch and turn the B side DRIVE knob back and forth.
- If you are running version 1.0 firmware, the color of the B LED will NOT change when you turn the DRIVE knob.
To update Sunset, please download the Strymon Update software.
MIDI Connections to Sunset
To begin using Sunset with an external MIDI device, connect the MIDI out jack from a pedal, controller, or computer interface to the EXP jack on Sunset. The following devices can be used to send MIDI messages to Sunset:
- Strymon MIDI EXP cable (link)
- Strymon Conduit MIDI Hub (link)
- Compatible 5-pin MIDI to 1⁄4” MIDI Interface:
- Disaster Area Designs – DPC Gen 3 Series, DMC Gen 3 Series, MIDIBox
- Empress Effects – MIDIbox2
Configuring Sunset to Use MIDI
Set EXP jack to MIDI Mode
Once you have connected Sunset to a MIDI source, you must set the EXP jack to MIDI mode.
- Press and hold the A footswitch while connecting the pedal to power.
- When the LEDs stop blinking, release the footswitch and turn the LEVEL knob on the B side until the B LED turns BLUE.
- Press either footswitch to store the EXP jack assignment.
Set MIDI Channel
Next, you will need to select a MIDI channel to communicate with Sunset. Sunset is set to MIDI channel 1 by default.
- Press and hold the B footswitch while connecting the pedal to power.
- When the LEDs stop blinking, release the footswitch and turn the LEVEL knob on the A side to set the MIDI channel. The A LED will change color as the MIDI Channel is changed.
- This setting requires a 1/4″ MIDI connection to set. Once the LED turns BLUE, it will blink until the pedal receives a MIDI Program Change message. Once a MIDI PC message is received, the pedal will be set to the MIDI channel that the message was sent through and the LED will stop blinking.
- GREEN – MIDI Channel 1
- AMBER – MIDI Channel 2
- RED – MIDI Channel 3
- Blue – MIDI Channels 4-16
Set MIDI Output Mode
The MIDI Output mode must be set to determine what kind of MIDI data is sent out by Sunset. ***NOTE: If you are only sending MIDI data to Sunset or if you are using the Strymon MIDI EXP cable, the MIDI Output mode must be set to OFF.***
- Press and hold the A footswitch while connecting the pedal to power.
- When the LEDs stop blinking, release the footswitch and turn the TONE knob on the A side to select what kind of MIDI data is sent from Sunset to other MIDI devices. Both LEDs will flash a color momentarily as the mode is changed.
- GREEN – ON – Using Sunset’s knobs and switches generates MIDI messages that are sent out of Sunset.
- AMBER – THROUGH – Incoming MIDI messages are sent out of Sunset without any additional MIDI messages generated by Sunset.
- RED – OFF (default) – No MIDI messages are sent out of Sunset.
Saving and Recalling Presets on Sunset with MIDI
Saving Presets
When set to MIDI mode, the currently loaded settings can be saved to any of Sunset’s 300 preset locations at any time.
- To enter SAVE mode, press and hold the A footswitch. The A LED will start blinking BLUE.
- Send a MIDI Program Change message from your connected MIDI device to Sunset. The LED will stop flashing and Sunset will save the settings to that preset location.
- To save a preset to the currently loaded preset location, simply press the A footswitch once again while the LED is flashing.
Recalling Presets
- To recall presets on Sunset, send the pedal a MIDI Program Change message on the same channel the pedal is set to that corresponds to the desired preset you would like to recall.
Sunset contains 300 preset locations, numbered sequentially from 0-299. Because MIDI Program Change messages have a maximum number of 128 (0-127) the presets are grouped into three MIDI patch banks:
- MIDI BANK 0 = PRESETS 0-127
- MIDI BANK 1 = PRESETS 128-255
- MIDI BANK 2 = PRESETS 256-299
Sunset always powers up in MIDI Patch Bank 0, so if you plan to stay within the first 127 presets, simply send a standard MIDI Program Change message to load a preset.
If you will be using MIDI Banks 1 and/or 2, it is advisable to send a standard MIDI Bank Change message (MIDI CC# 0 with a value equal to the MIDI Bank#) before each MIDI Program Change.
Selecting bank 0, patch 127 will put Sunset into Manual mode. In this mode, the pedal will be set to the current knob and switch settings. No preset data can be stored at this preset location.
How do Strymon pedals send/receive MIDI messages sent via 1/4″ TRS MIDI cable?
On our pedals equipped with a 1/4″ TRS MIDI connection (Riverside and Sunset), the MIDI data is received by the pedals from the TIP of this connection. When MIDI OUT or THROUGH is enabled on these pedals, the MIDI data is sent out of the pedal from the RING of the TRS connection.
What are some examples of the 6 circuits available in Sunset?
The following lists a few examples of pedals that use a particular overdrive architecture. It is important to remember that the final sound produced by a pedal is highly dependent on the individual design choices affecting signal level and frequency response throughout any circuit type, as well as the specifics of the clipping section including op-amp and diode types and specific implementation. That’s why you will find some very different sounding pedals in the same circuit category. Sunset is our own take on these classic configurations.
Ge – The Ge type’s dual path architecture is a newer classic, being brought into existence by Bill Finnegan with the introduction of the Klon Centaur. A host of excellent sounding ‘Klones’ have followed, creating a category of overdrive in its own right.
texas – The soft clipper is probably the most ubiquitous of overdrive types. The classic example is the Ibanez Tube Screamer, starting with the original TS-808. Boss followed with the SD-1 a couple years later. Modern examples of soft clippers include the Xotic Effects BB Preamp and RC Boost, Wampler Paisley Drive, the Timmy by Paul C, and many other great sounding pedals.
treble – Our Treble type uses the same basis a the JFET type, while allowing for a reduction in bass frequencies to tighten up and drive another pedal or higher gain amp tone.
2stage – The configuration is a favorite with the DIY crowd, where some designs use a switch to select either soft or hard clipping. Some current examples include favorites like the Barber Direct Drive, Wampler Ecstasy/Euphoria, and the Mad Professor Sweet Honey Overdrive. The vintage DOD FX53 Classic Tube pedal is also on this list.
hard – The hard clipper is often found in higher gain pedals that may be considered distortion pedals. Some classic examples include the ProCo Rat, the Boss DS-1, and the MXR Distortion+.
JFET – The JFET architecture is found in the preamp section of the Echoplex EP-3 Tape Delay, and has spawned numerous preamp/boost pedals that capture the warmth and fullness of its mild gain and clipping characteristics.
How do I perform a factory reset on Sunset?
You can restore all of the modes and functions on Sunset back to factory settings by performing a Factory Reset.
- At power up, press and hold the B channel footswitch while plugging in the power to Sunset. Both the A and B channel LEDs will blink.
- Release the footswitch and turn the A channel DRIVE knob from 0-100% two (2) times.
- The A channel LED will change to AMBER at the extremes of the knob range and finally blink RED to indicate that the reset is taking place.
- Once the A channel LED stops blinking RED, the reset is complete and Sunset is ready for use.
What are the factory settings on Sunset?
- EXP Input Jack: Assigned to work in VOLUME PEDAL mode.
- Expression Pedal Mode Assignment: Assigned to control both A and B channel DRIVE knobs.
- Noise Reduction: OFF
- Bypass Mode: True Bypass
These settings can be restored manually or by performing a factory reset.
Do Strymon pedals include power supplies?
All Strymon pedals sold within North America (except OB.1) include a 9VDC 660mA power supply. OB.1 includes a 9V battery.
What are the power supply requirements?
We recommend a power supply that provides 9VDC (center negative) at a minimum of 250mA.
Do not subject your Strymon pedal to any voltage above 9V. Doing so will damage your pedal and void your warranty.
Can I use a daisy chain power supply?
We don’t recommend using daisy chain power supplies. Ground loops are commonly caused when using a daisy chain power cable to power multiple pedals. This creates a ground loop between every pedal in the daisy chain. Ground loops allow stray magnetic fields to introduce hum into your signal path.
If the only type of effect you use is distortion you may not have (or hear) the ill effects. But, if you have modulation and delay pedals the likelihood of ground loops wreaking havoc on your signal is high.

