Product Description
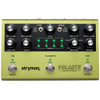
Volante - Magnetic Echo Machin
SOUNDS FROM THE EXPANSE.
Create instant retrofuture atmosphere with evocative vintage delay tones. Activate your imagination with evolving ambient echoes and warm, organic feedback with just the right amount of grit. Sculpt your soundscape in real time as Volante becomes an extension and expansion of your musical instrument. Infuse your pedalboard with stunning vintage vibes that resonate and inspire.
Delays For Days.
THREE MAGNETIC DELAY TYPES, REVERB, SOUND ON SOUND, AND MORE.
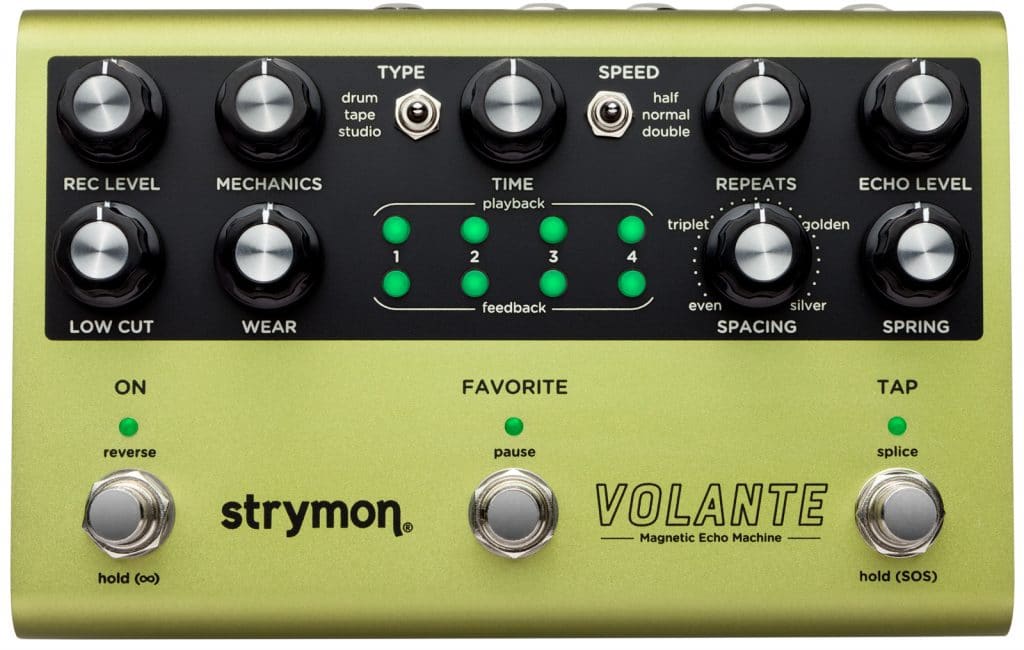
Delivering truly exceptional sound quality and intuitive playability, Volante is designed to radically enhance the sonic expressiveness of your pedalboard. Featuring magnetic drum echo, tape echo, and reel-to-reel studio echo, Volante is a stereo multi-head delay that also offers a Sound on Sound mode and a vintage spring reverb algorithm. Volante’s powerful sound-sculpting controls provide limitless sonic possibilities.
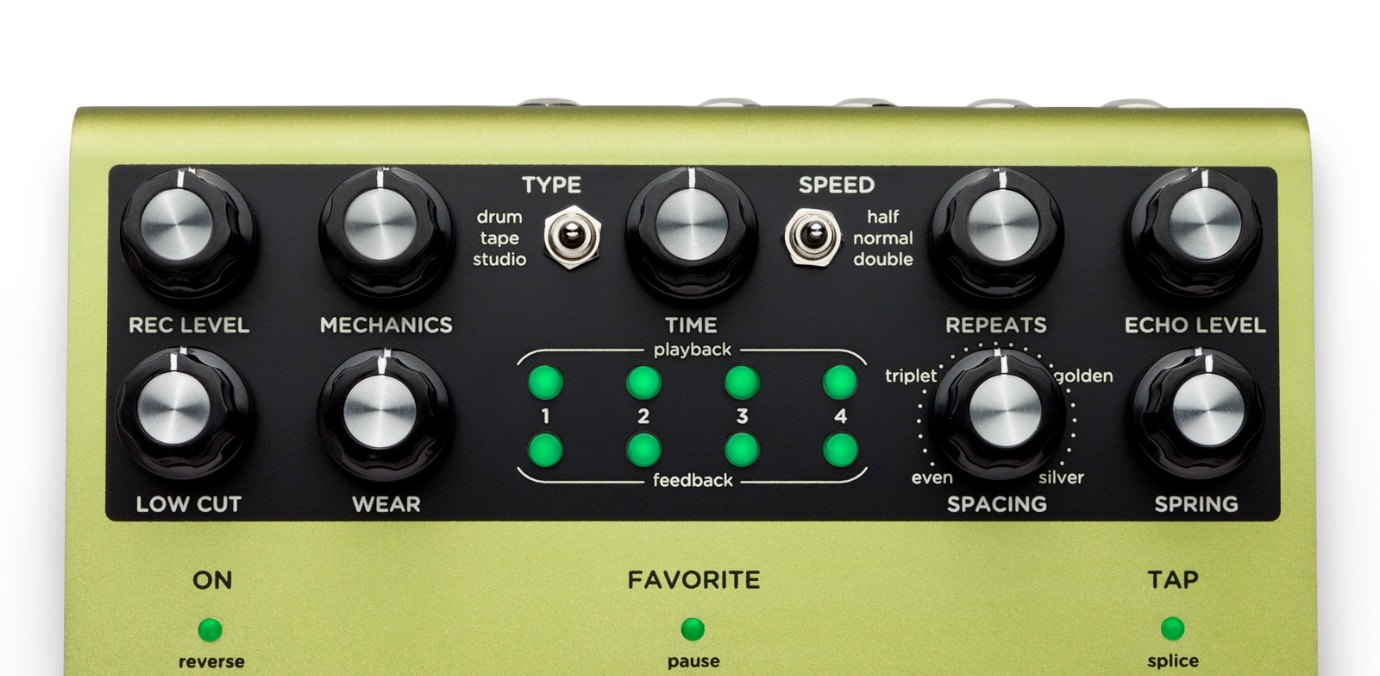
To capture the nuance and complexity of classic tape and drum echo machines, every last magnetic delay system attribute was relentlessly studied and faithfully recreated. From the sought-after natural saturation and soft clipping of magnetic media when driven hard, to hands-on real-time controls for mechanics, wear, head-spacing, and low cut, Volante instantly adds tons of vibe to your sound.
MULTI-HEAD MAVEN.
Volante provides the full experience and sonic attributes of iconic multi-head echo machines. At the center of Volante’s control surface are four delay playback heads with individual feedback, panning, and level controls—delivering unlimited creative options right at your fingertips. All of this range allows the creation of complex rhythmic patterns as well as reverb-like atmospheric textures.
Three Vintage Echo Machines.
Magnetic drum echoes are famous for their warmth and for their harmonically rich and saturated sounds. This is due in large part to the many tube stages present in the most sought-after units. There were tubes in the input buffer, the signal mixer, the record and playback amplifiers, the tone shaping circuit, and the output mixing circuit.
Every sonic aspect of our favorite drum echoes has been meticulously reproduced within Volante. Dial in any possible sound from the full range of the best vintage drum echo units in conditions ranging from fresh-from-factory to road-worn classic.
CLASSIC TAPE ECHO EXPERIENCE.
Volante gives you superbly crafted multi-head tape echoes, including the smooth tape saturation and the characteristic imperfections and nonlinearities inherent to the sound of those vintage machines.
Mechanical alignment, head wear, and tape crinkles, splices, and contaminants are all accounted for in Volante, giving you all the richness and complexity of a classic tape echo, with modern control and stability. Volante also allows you to recreate the irregular head spacing of some of the classic tape echo machines.
TRUE STUDIO TAPE SOUND.
The professional reel-to-reel machines of the 50s and 60s were high-fidelity units built to accurately reproduce full-range audio signals. In the hands of creative engineers, these machines also doubled as some of the earliest studio effects, producing some of the fattest sounds imaginable.
Of Volante’s three magnetic echo types, the Studio Echo provides the cleanest sound, able to sustain the highest number of repeats with minimal degradation. Volante gives you a pristine studio delay with the full-bodied warmth and fidelity of reel-to-reel tape.
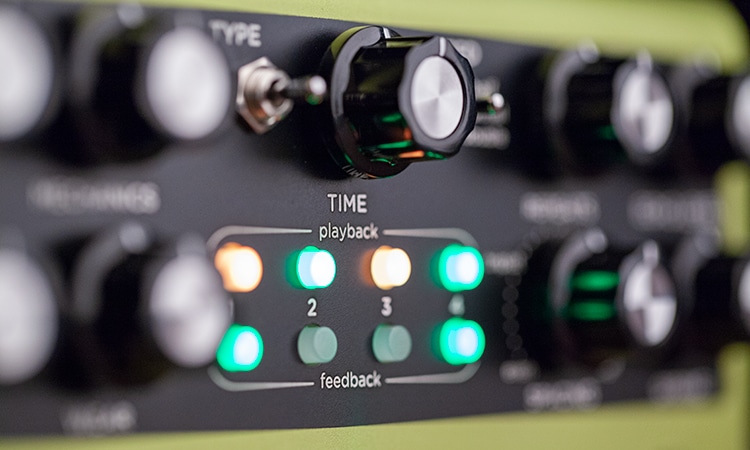
Each head’s playback level can be set for full volume, half volume, or off.
Independent of playback level, you can switch each head in or out of the feedback circuit.
You can even switch heads into the feedback circuit that are not activated for playback.
All of this control allows the creation of interesting and complex rhythmic patterns as well as unique atmospheric delay textures.
Control & Routing
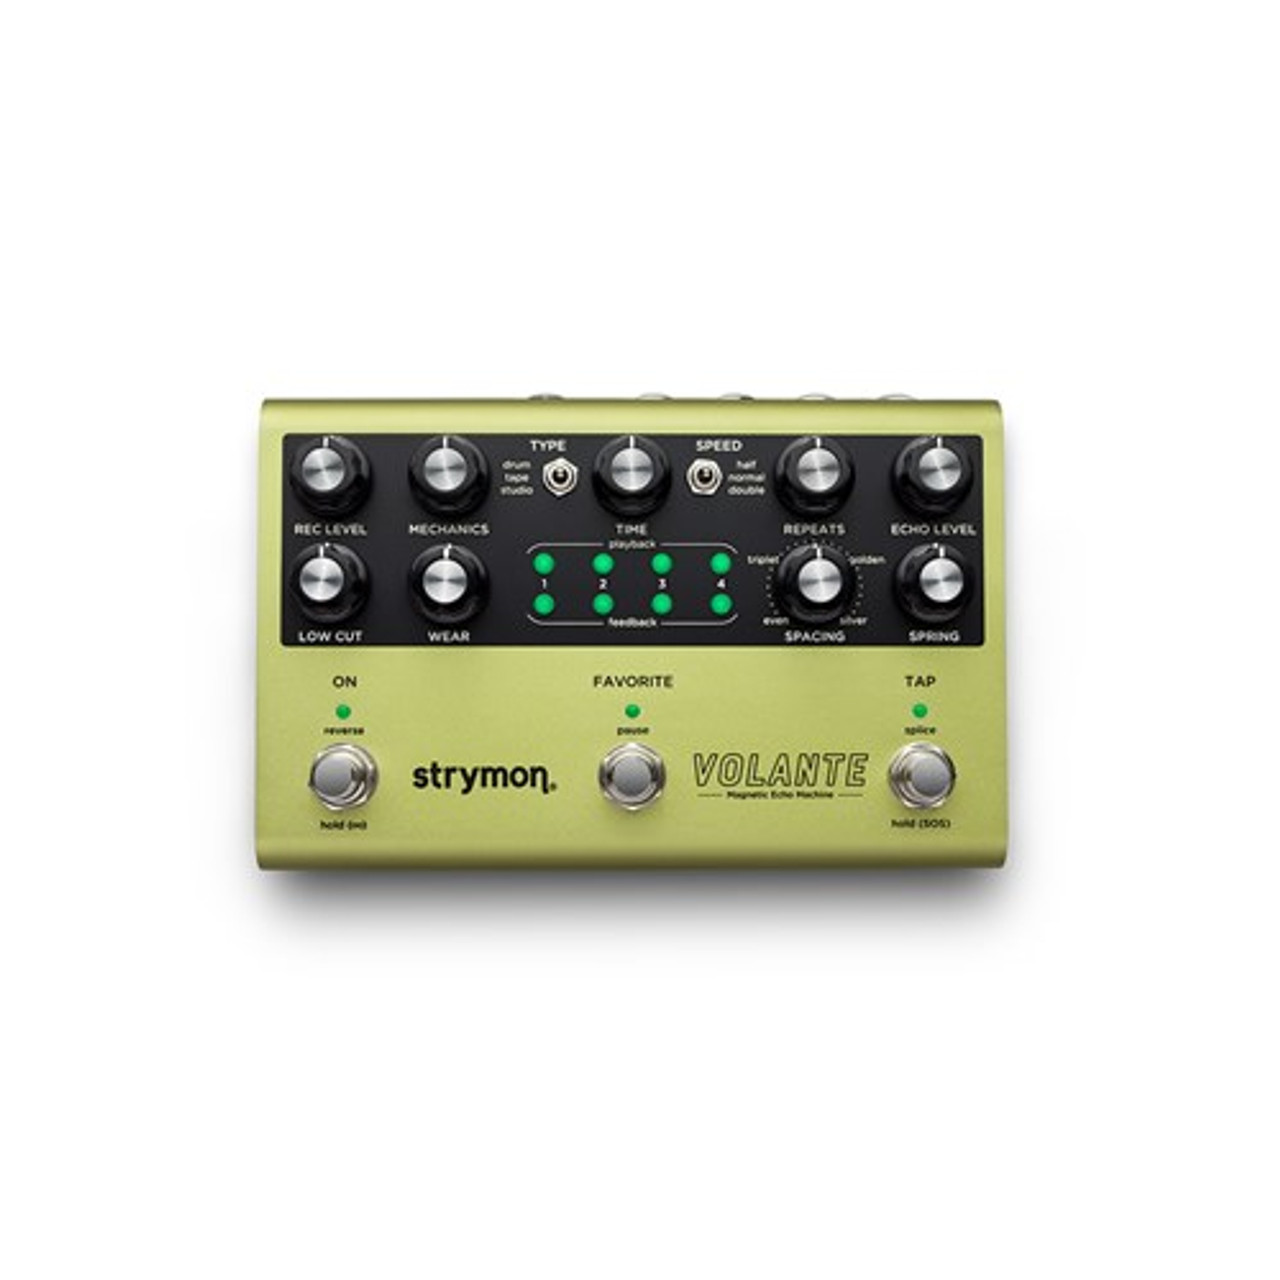
FRONT PANEL

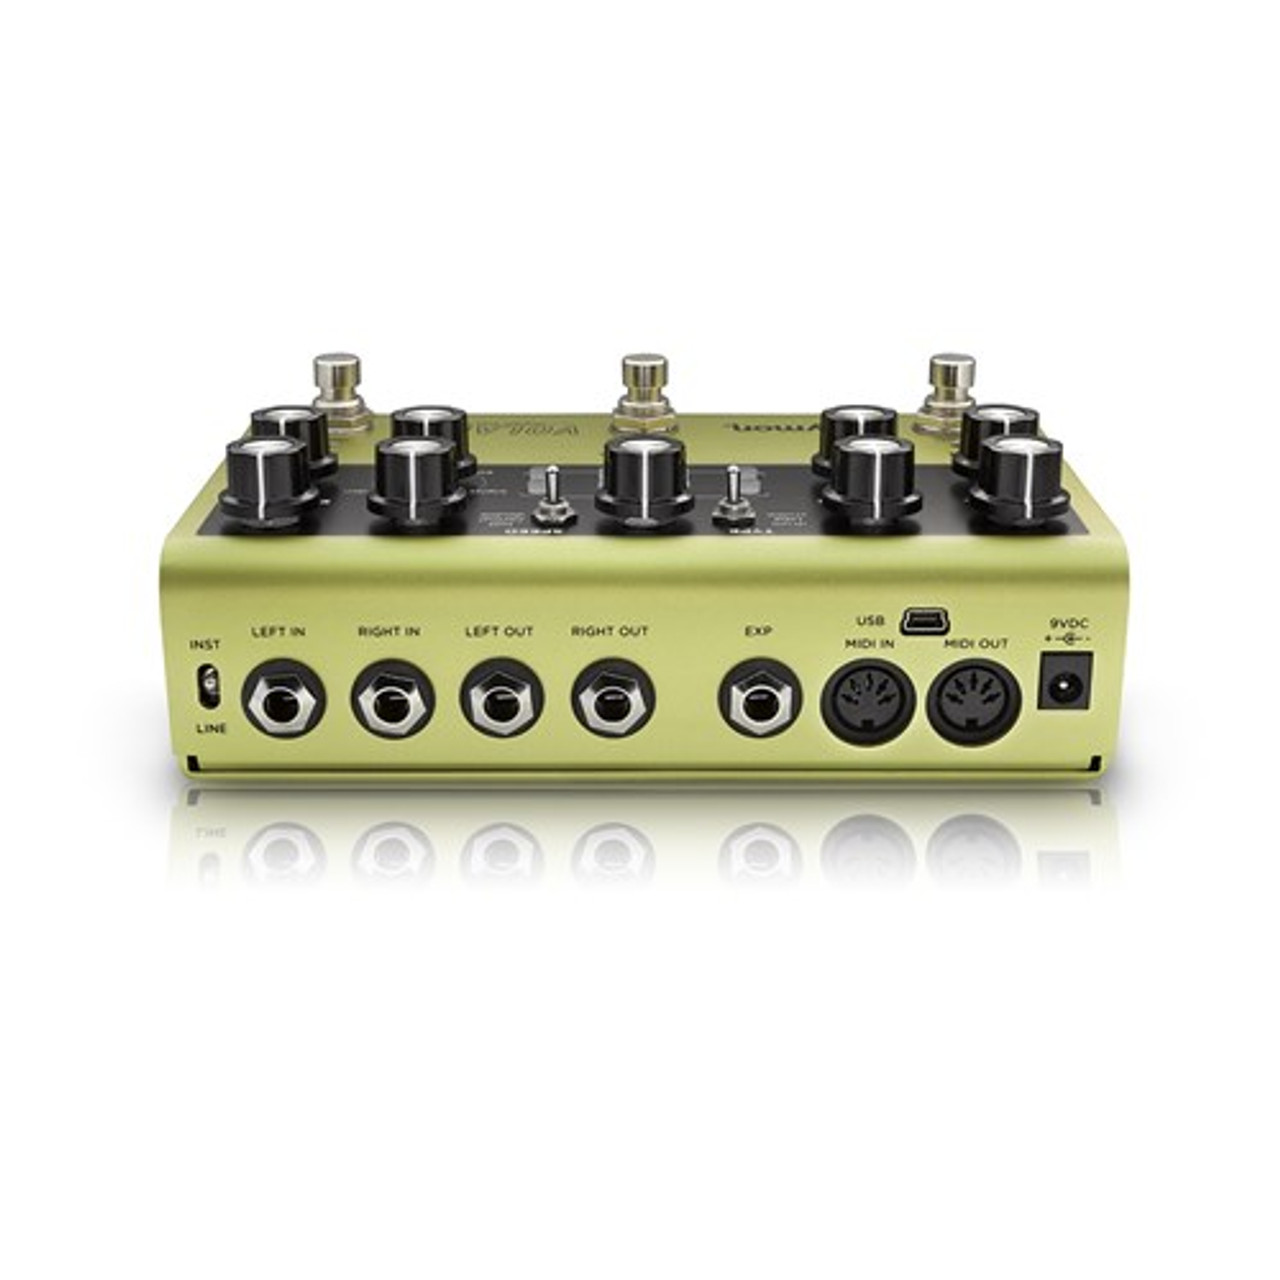
REAR PANEL
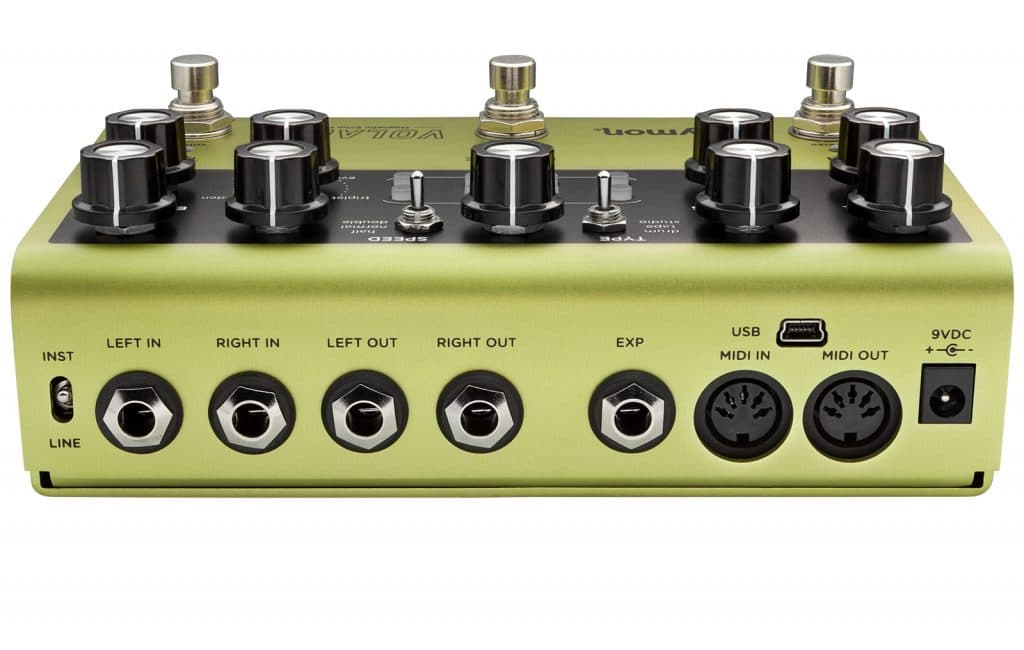
COMPLETELY ANALOG DRY PATH.
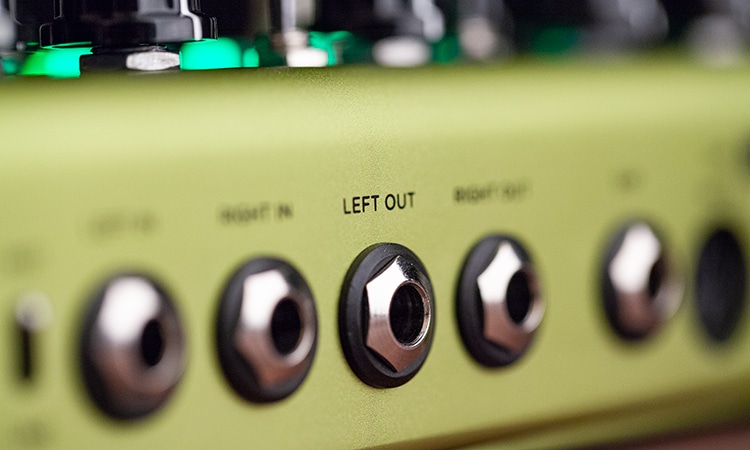
In a typical digital effect the dry signal gets converted to digital, causing conversion noise and latency. Signals are often attenuated before combining digital dry and wet, with makeup gain amplifying the conversion noise. To avoid this, we’ve equipped Volante with a completely analog dry path, featuring all-analog, ultra low noise, discrete, class-A stereo JFET preamps. Volante is truly a studio-quality effect.
INSANELY POWERFUL DSP.
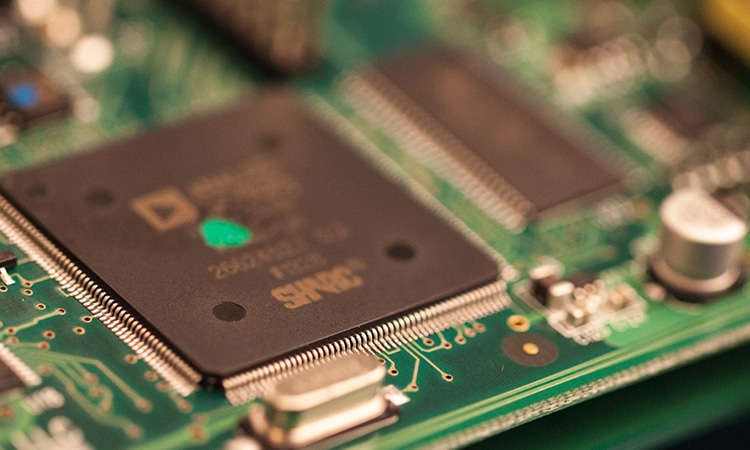
We’ve outfitted Volante with the incredibly powerful Analog Devices SHARC ADSP-21375 processor, which provides a 266 MHz core instruction rate, and an incredible 1.596 Gigaflops of peak performance. Thanks to this high-powered technology platform within Volante, we had the freedom to craft our processor-intense echo algorithms without compromise.
Specs
Sound Design
- Multi-head magnetic media delay machine providing four playback heads with individual feedback, panning, and level controls
- Processor-intense algorithms deliver meticulously nuanced recreations of vintage magnetic echo systems (drum echo, tape echo, studio reel-to-reel echo)
- Dedicated control over echo machine tone and media: Low Cut, Mechanics, Wear
- Input Record Level for clean reproduction to warm, fat saturation
- Independent Spring Reverb
- Sound on Sound looping mode (mono) with reverse, pause, splice, and infinite repeat functions
- High impedance stereo input
- Stereo output
- Input Level switch allows for both instrument and line level signals
- On, Favorite, and Tap Tempo footswitches
- Expression pedal input allows the connection of an expression pedal, external tap pedal, 1/4″ to MIDI cable, or MultiSwitch Plus.
- Full featured MIDI in/out supporting MIDI CCs, program changes, and more
- USB jack for controlling MIDI via computer
Audio Quality
- Analog dry path for a zero latency dry signal that is never converted to digital
- Premium JFET analog front end
- Ultra low noise, high performance 24-bit 96kHz A/D and D/A converters provide uncompromising audio quality
- Super high performance SHARC DSP
- 32-bit floating point processing
- 20Hz to 20kHz frequency response
- Audio Input Impedance: 1M Ohm
- Audio Output Impedance: 100 Ohm
More
- True Bypass (electromechanical relay switching) or selectable transparent Analog Buffered Bypass
- Strong and lightweight anodized olive green aluminum chassis
- 9V DC power supply included
- Power requirements: maximum 9 volts DC center-negative, with a minimum of 300mA of current
- Dimensions:
- 4.5″ deep x 7″ wide x 1.75″ tall
- 114.3 mm deep x 177.3 mm wide x 44.5 mm tall
- Designed and built in the USA
All Strymon pedals are Designed and Built in the USA.
WHAT IS VOLANTE?
Volante is a stereo multi-head delay featuring magnetic drum echo, tape echo, and reel-to-reel studio echo that also offers a sound-on-sound looper and vintage spring reverb.
HOW DO YOU SET DELAY TIME ON VOLANTE?
Volante is a multi-head delay machine with 4 playback heads and a single record head. The delay time is determined by a combination of two factors: the distance between the record and playback heads, and the speed of the media. The distance is determined by the TIME knob. The SPEED switch selects the speed of the media.
Delay Time Components
- The playback buttons are used to select which of the heads will be heard with each pass of the recording media. Each of the heads have their own tap division relative to the quarter note delay time of head 4:
- With SPACING set to even:
- Head 1 – 16th note
- Head 2 – 8th note
- Head 3 – dotted 8th note
- Head 4 – quarter note
- With SPACING set to triplet:
- Head 1 – 16th note triplet
- Head 2 – 8th note triplet
- Head 3 – quarter note triplet
- Head 4 – quarter note
- With SPACING set to golden or silver, the heads provide dense, non-overlapping delay repeats that are not tied to a specific tap division except for head 4 which is a quarter note repeat.
- The feedback buttons select which of the corresponding heads will feed back into the record head.
- The TIME knob is used to set the delay time with head 4 as the quarter note head. The delay time range is dependent on the SPEED switch setting.
- half – 400ms – 4 seconds
- normal – 200ms – 2 seconds
- double – 100ms – 1 second
- The REPEATS knob controls the feedback level of the delay repeats for the playback heads that have their corresponding feedback engaged.
- The SPACING knob adjusts the distance between the playback heads. Turning the knob morphs the heads in between the marked settings.
- The TAP footswitch sets quarter note delay time for playback 4. The TAP LED will flash to indicate the delay time in quarter notes.
- Every 2 presses of the TAP footswitch will set the delay time in quarter notes.
- TAP tempo range at playback 4 in all SPEED settings: 100ms – 2 seconds
ADDITIONAL SETTING TIPS
- For a single delay repeat for any of the heads, disengage all the feedback buttons, or turn the REPEATS knob to 0%
- For multiple delay repeats, engage the feedback for one or more of the engaged playback heads and set the REPEATS knob as desired.
- For a standard, single quarter note delay:
- Engage playback and feedback 4 only.
- For a single dotted 8th note delay:
- Engage playback and feedback 3 only.
- Set the SPACING knob to triplet.
- For an eighth note triplet delay:
- Engage playback and feedback 2 only.
- Set the SPACING knob to triplet.
- When using the golden or silver ratio SPACING setting, engage the playback and feedback for 2 or more of the heads.
- The shortest delay time is available from playback 1 with the SPACING knob set to triplet. When set in this manner, the delay time at playback 1 is 1/6 of the delay time set with either the TIME knob or the TAP footswitch.
- As the TAP tempo range at playback 4 in all SPEED settings is 50ms – 2 seconds, you can tap in a 100ms delay at head 4 with the TAP footswitch while in half speed, then, change the SPEED to double to get a 25ms delay at head 4. This means you will get a ~4.1ms delay time at playback 1 with the SPACING knob set to triplet when set this way.
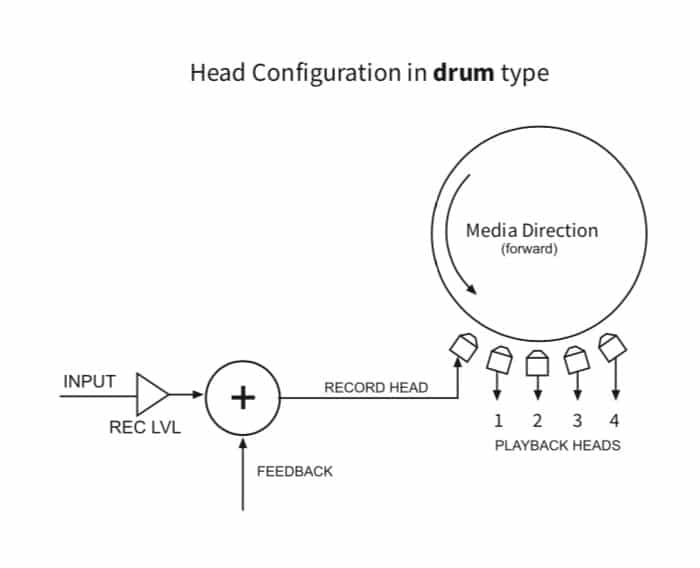
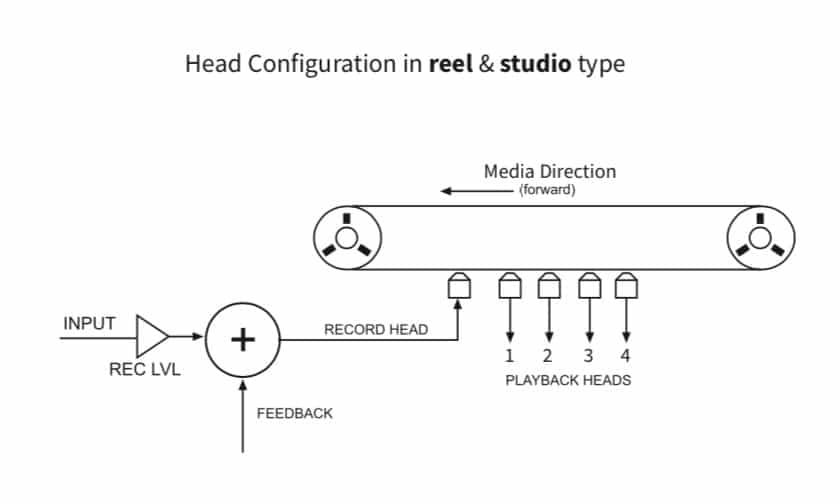
HOW DO THE PLAYBACK AND FEEDBACK BUTTONS WORK ON VOLANTE?
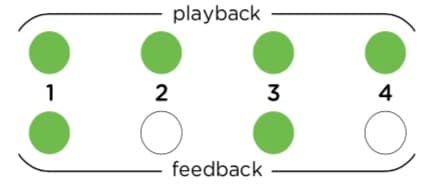
Volante has 4 playback and 4 feedback buttons that are used to select which of the playback heads are active which will be feeding back to the record head.
PLAYBACK BUTTONS
When in standard operation, Volante has 4 playback heads, each of which can be enabled or disabled with their corresponding playback buttons.
- Press Volante’s playback buttons to select which of the playback heads are active. A GREEN (full volume) or AMBER (half volume) playback button indicates that the head is active.
- To set a playback head to half volume, press and hold the playback button until it turns AMBER.
- If you are looking for multiple delay repeats per delay cycle, engage 2 or more playback heads.
FEEDBACK BUTTONS
Each playback head has a corresponding feedback button which determines if the signal from the head will fed back to the record head.
- Press Volante’s feedback buttons to select which of the feedback heads are active (GREEN).
- If you want just a single delay repeat, engage any 1 of the playback heads with no feedback buttons engaged.
- If you want that delay repeat to continue playing back, engage 1 of the feedback buttons and use the REPEATS knob to control the amount of the delay signal being fed back to the record head.
The SPACING knob is used to adjust the spacing between the playback heads. Turning the knob morphs the heads between the noted even, triplet, golden ratio, and silver ratio settings.
- even: Head 1 – 16th note, Head 2 – 8th note, Head 3 – dotted 8th note, Head 4 – quarter note
- triplet: Head 1 – 16th note triplet, Head 2 – 8th note triplet, Head 3 – quarter note triplets, Head 4 – quarter note
- golden: Head spacing resulting in dense, non-overlapping repeats biased towards head 1.
- silver: Head spacing resulting in dense, non-overlapping repeats biased towards head 4.
Here are some examples to help with using the playback and feedback buttons (with the SPACING knob set to even):
- If you have no playback buttons on, you will not hear any repeats, even if you have all the feedback buttons on.
- If you have only playback 4 on and all feedback buttons are off, you will get a single quarter note repeat.
- If you turn on feedback 4 only with playback 4 on, you will get quarter note repeats and the REPEATS knob will control the amount of feedback for the number of repeats.
- If you turn on all 4 playback heads, but only turn on feedback 4, you will hear 4 delay repeats per quarter note for every delay cycle.
- If you turn on all 4 playback heads, but only turn on feedback 3, you will hear 4 delay repeats, but they will repeat every dotted 8th note after the initial repeat since that is the tap division that head 3 corresponds to.
ADDITIONAL TIPS
- For a standard, quarter note delay, engage both playback and feedback 4 and set the SPACING knob to even. Use the TIME knob or tap in a quarter note tempo with the TAP switch to set the delay time.
- If you want eighth note triplet delay repeats, engage both playback and feedback 2 and set the SPACING knob to triplet.
- For dense and atmospheric golden and silver ratio delay settings, engage 2 or more of playback heads 1-3 and at least 1 of the corresponding feedback buttons.
- A playback head can be fed back to the input even if its playback button is disengaged.
- Engaging multiple feedback buttons will help shape atmospheric and rhythmic delay repeats.
HOW DOES THE SPEED SWITCH WORK ON VOLANTE?
Volante’s SPEED switch controls the recording and playback speed of the recording medium which affects the fidelity and mechanical response of the selected TYPE.
- Slower speeds yields lower fidelity delays and looper recordings.
- At slower speeds, the sound of the delays is more susceptible to irregularities generated by a higher MECHANICS setting.
- Faster speeds provides higher fidelity delays and looper recordings.
- Volante offers a true varispeed system with pitch effects as the SPEED switch is toggled faster (higher pitch) or slower (lower pitch).
- Changing the SPEED will also result in a proportional change to the delay time range of the TIME knob:
- half: 400ms – 4s
- normal: 200ms – 2s
- double: 100ms – 1s
- The maximum recording time for the Sound-on-Sound looper is also affected by the SPEED.
- half – 64 seconds
- normal – 32 seconds
- double – 16 seconds
· HOW DO YOU RECALL AND SAVE PRESETS ON VOLANTE?
There are 8 on-board presets accessible with Volante’s controls. The currently selected Favorite preset can be instantly recalled by pressing the FAVORITE footswitch while in delay mode.
- Press FAVORITE to recall the currently selected Favorite setting which consists of all knob, switch, button settings, secondary functions, and expression control settings. (GREEN FAVORITE LED On)
To change the currently selected Favorite preset:
- Press and hold to show the currently selected Favorite preset in the 8 playback/feedback LEDs. The current Favorite preset will show as a RED LED while all other playback/feedback LEDs are off.
- To select a new Favorite preset from the 8 available preset locations, press any one of the 8 playback/feedback buttons while holding down the FAVORITE footswitch.
To SAVE a new Favorite setting to any of the 8 on-board slots:
- First, dial in the desired setting with all of the knobs, buttons, toggle switches, and secondary functions.
- Press and hold the FAVORITE footswitch for a few seconds until the FAVORITE LED blinks BLUE.
- Then, press any one of the 8 playback/feedback buttons to save to that preset location.
- If using MIDI to recall presets, you can send a MIDI Program Change message to Volante while the FAVORITE LED blinks blue to save the preset to the location that corresponds with the MIDI Program Change message that is received.
RECALLING PRESETS VIA MIDI
If you are controlling Volante via MIDI, you have access to 300 presets available via MIDI Program Change through either the 5-pin DIN MIDI IN port, the USB-mini port, or through the EXP jack set to PRESET, SPEED, or TRANSPORT mode. These 3 power-up modes for the EXP jack will all accept MIDI Program Change messages to recall presets on Volante on the MIDI Channel that the pedal is set to.
How to Set the EXP Jack to Accept 1/4″ MIDI
- Before powering up, press and hold down the TAP footswitch.
- While still holding down the TAP footswitch, plug in the power. Continue holding down the TAP footswitch until until all the LED’s light up (except playback 4).
- Release the footswitch and turn the ECHO LEVEL knob to any one of the 3 EXP modes:
- Preset mode – BLUE TAP LED
- Speed mode – PURPLE TAP LED
- Transport mode – RED TAP LED
- Press any of the footswitches to store this setting and begin using Volante.
How to Set the MIDI Channel
- Before powering up, press and hold down the TAP footswitch.
- While still holding down the TAP footswitch, plug in the power. Continue holding down the TAP footswitch until until all the LED’s light up (except playback 4).
- Release the footswitch and turn the REC LVL knob to select the desired MIDI Channel:
- Channel 1 – GREEN ON LED
- Channel 2 – AMBER ON LED
- Channel 3 – RED ON LED
- Channels 4-16 – Blinking BLUE ON LED
- When setting to Channels 4-16, you must send a MIDI Program Change message on the desired MIDI Channel (4-16) that you would like to control Volante on while the ON LED is blinking BLUE. Once the MIDI Program Change message is received, the MIDI Channel will be set and Volante will boot up for use.
Additional MIDI Control Information
Volante contains 300 preset locations, numbered sequentially from 0-299. Because MIDI Program Change messages have a maximum number of 128 (0-127) the presets are grouped into three MIDI patch banks.
– MIDI BANK 0 = PRESETS 0-127
– MIDI BANK 1 = PRESETS 128-255
– MIDI BANK 2 = PRESETS 256-299
Volante always powers up in MIDI Patch Bank 0, so if you plan to stay within the first 127 presets, simply send a standard MIDI Program Change message to load a preset.
If you will be using MIDI Banks 1 and/or 2, it is advisable to send a standard MIDI Bank Change message (MIDI CC# 0 with a value equal to the MIDI Bank#) before each MIDI Program Change message.
Selecting bank 0, presets 0-7 will correspond to the 8 on-board Favorite presets accessible via the FAVORITE footswitch and the 8 playback/feedback buttons. Also when in bank 0, patch 127 will put Volante into Manual mode. In this mode, the pedal will be set to the current knob, button, and switch settings. No preset data can be stored at this preset location.
HOW DO I USE THE SOUND-ON-SOUND LOOPER ON VOLANTE?
With Volante’s Sound-on-Sound (SOS) looper, you can record audio loops of up to 64 seconds depending on the setting of the SPEED switch. Higher SPEED settings result in higher fidelity recordings, while lower SPEED settings yield lower fidelity recordings. All audio received at the input(s) along with any delay repeats in the audio buffer can be recorded to Volante’s looper.
SOS Recording Time
- half speed – 64 seconds
- normal speed – 32 seconds
- double speed – 16 seconds
RECORDING A LOOP IN SOS MODE
To start using the SOS looper, you must first put Volante into SOS looper mode.
- Press and hold down the TAP footswitch to enter SOS looper mode (TAP LED OFF).
Recording a Loop
- Press TAP at the same time you start your playing to start your recording, setting the ‘In’ splice. (TAP LED blinks AMBER)
- Press TAP again at the end of playing your loop to set the ‘Out’ splice and immediately start playing back from the IN splice. (TAP LED lit solid AMBER)
- Press TAP once more to erase the recorded loop (TAP LED OFF).
- (Optional) Press and hold the ON footswitch for 1 second to engage the Infinite Hold to disable overdubs and prevent the loop from degrading with each pass. (ON LED will blink continuously)
ADDITIONAL SOS LOOPER FUNCTIONS
Infinite Hold – Disables the Record head and continuously plays the loop length audio without overdubs or audio degradation.
- Press and hold the ON footswitch for 1 second to engage the Infinite Hold. (ON LED will blink continuously)
- Or, when using an optional MultiSwitch+ connected to Volante’s EXP jack set to Transport Mode, press the C footswitch to engage the Infinite Hold.
Once you have spliced out, your loop will immediately play back from the ‘In’ splice point. The record head will still be active so anything you play at this point will also overdub on top of the loop playing back. Also, the audio of the loop will degrade with each full pass. You can engage the Infinite Hold to disable overdubs and prevent the loop from degrading.
REVERSE – Reverses the playback direction of the recorded loop from the moment the function is engaged.
- Momentarily press the ON footswitch to engage the REVERSE function. (ON LED RED)
- Or, when using an optional MultiSwitch+ connected to Volante’s EXP jack set to Transport Mode, press the A footswitch to engage the REVERSE function.
PAUSE – Stops/Starts the playback of the recorded loop.
- Momentarily press the FAVORITE footswitch to stop/start the playback of the loop. (FAVORITE LED AMBER)
- Press and hold down the FAVORITE footswitch to stop/start the playback of the loop with a mechanical slowdown/startup effect. (FAVORITE LED AMBER)
- The playback of the loop will start back up with a mechanical effect as soon as you release the FAVORITE footswitch.
- The speed of the slowdown/startup effect can be adjusted by pressing and holding down FEEDBACK buttons 1 and 4 and turning the MECHANICS knob. (LEFT = slower, RIGHT = faster)
- Or, when using an optional MultiSwitch+ connected to Volante’s EXP jack set to Transport Mode, press the B footswitch to engage the latching mechanical PAUSE.
§ HOW DO I ACCESS ADDITIONAL PARAMETERS ON VOLANTE?
On Volante, there are several additional controls and functions that are available in addition to the primary hardware controls on the pedal. *Note: Each of these parameters are saved independently in each preset.
LIVE EDIT FUNCTIONS
- To access the Live Edit functions, press and hold down feedback buttons 1 and 4.
- While holding down the buttons, turn the knob for the corresponding Live Edit Function:
- SPRING Decay – Turn SPRING knob
- Left = shorter decay, Right = longer decay
- PAUSE with Mechanics Ramp Speed – Turn MECHANICS knob
- Left = slower pause with mechanics, Right = faster pause with mechanics
- SOS Looper Repeats Level – Turn REPEATS knob
- Left = fewer looper repeats, Right = more looper repeats
- Set to maximum for infinite looper playback.
- SOS Looper Level – Turn ECHO LEVEL knob
- Left = quieter looper playback, Right = louder looper playback
- Respond to MIDI Clock – Turn REC LEVEL knob, status shown with ON LED.
§ HOW TO ADJUST THE POWER UP MODES ON VOLANTE
There are several Power Up Functions on Volante that control various global parameters. All Power Up Function settings will persist through power cycles.
- To access the Power Up Functions:
- Before powering up, press and hold the TAP footswitch, then, plug in the power to the pedal.
- After a few seconds, all the LED’s (except playback 4) will light up. You can release the footswitch.
While in this state, the buttons and knobs correspond to the different Power Up Functions:
- Bypass mode
- Press the feedback 1 button, status shown on button LED
- True Bypass – GREEN (default)
- Buffered Bypass – RED
- Persist – Repeats in the delay buffer will persist when the pedal is bypassed.
- Press the feedback 2 button, status shown on button LED
- Persist On – GREEN
- Persist Off – RED (default)
- Output Sum – Sum the output signal to mono. Use LEFT OUT for summed mono signal.
- Press the feedback 3 button, status shown on button LED.
- Stereo output – GREEN (default)
- Sum output – RED
- Kill Dry – Mute the dry signal when Volante is both bypassed and engaged.
- Press the feedback 4 button, status shown on button LED.
- Kill Dry On – GREEN (dry signal is NOT present)
- Kill Dry Off – RED (dry signal IS present, default)
- MIDI CC Out – Sends MIDI CC messages to the MIDI outputs when a corresponding knob, button, or switch is used on the pedal.
- Press the playback 1 button, status shown on button LED.
- Send MIDI CC On – GREEN
- Send MIDI CC Off – RED (default)
- MIDI Program Change Out – Sends MIDI Program Change messages to the MIDI outputs when selecting a Favorite preset.
- Press the playback 2 button, status shown on button LED.
- Send MIDI Program Change On – GREEN
- Send MIDI Program Change Off – RED
- DIN MIDI OUT mode – Determines what type of MIDI data is sent by the MIDI OUT port.
- Press the playback 3 button – status shown on button LED
- Out – GREEN (default), only messages generated by Volante’s controls are sent to the MIDI OUT port.
- Through – RED, MIDI messages received at Volante’s MIDI IN are echoed to the MIDI OUT port without adding MIDI messages generated by the controls.
Factory Reset – Resets all presets, power up functions, and secondary parameters to factory settings.
- To access the Factory Reset:
- Before powering up, press and hold the ON footswitch, then, plug in the power to the pedal.
- After a few seconds, the 8 playback (GREEN) and feedback (AMBER) LEDs will light up and the ON footswitch will be blinking RED. You can release the footswitch.
While in this state:
- Sweep the TIME knob from 0% to 100% twice.
- Status shown on FAVORITE LED with it lighting up at the 0% (AMBER) and 100% (RED) extremes.
- When the reset is initiated, all 3 footswitch LEDs will be blinking RED.
- When the footswitches stop blinking, the pedal will power cycle and start up as normal.
- Off = RED LED (default)
- On = GREEN LED
- MIDI Expression – Turn LOW CUT knob, status shown with ON LED.
- Off = RED LED – Does not respond to MIDI Expression CC# 100 (default)
- On = GREEN LED – Responds to MIDI Expression CC# 100
ADDITIONAL SETTINGS
- Head Playback Level – Press and hold down the desired head’s playback button for 1 second to select half volume for that head. (playback button will turn AMBER)
- Press and hold down the same playback button for 1 second to return back to full volume. (playback button will turn back to GREEN)
- Head Panning – Press and hold the desired head’s feedback button and turn the TIME knob to set the panning.
- FAVORITE LED will illuminate RED when panning is centered.
- When using only the LEFT OUTPUT, the delay output is set to mono.
§ HOW MECHANICS AFFECTS THE DIFFERENT DELAY TYPES
The MECHANICS knob provides modulation and additional media contaminants affects each of the 3 delay types a little differently from each other:
- drum – The MECHANICS knob increases the amount of warping of the metal spinning platter…
- tape – Wow and flutter is applied as the MECHANICS knob is turned up. Tape crinkle is added as you turn past the 12 o’clock noon position.
- studio – A fixed rate LFO modulates the delay time with the depth of the LFO increasing as you turn up the MECHANICS. There are no additional irregularities or contaminants applied as you turn up the MECHANICS with the studio delay mode.
Note: Adjusting the SPEED switch also affects the speed of the modulation.
USING MIDI CLOCK WITH VOLANTE
On Volante, you can synchronize the delay repeats to MIDI clock that is received from any of the MIDI inputs:
- 5-PIN DIN MIDI IN port
- 1/4″ TRS MIDI IN at the EXP jack set to PRESET, SPEED, or TRANSPORT mode
- USB input
To set Volante to respond to MIDI clock:
- Press and hold down feedback buttons 1 and 4.
- While holding down the buttons, turn the REC LEVEL knob to adjust whether Volante will respond to MIDI clock; the status is shown on the ON LED:
- Off (Turn LEFT) = RED LED (default)
- On (Turn RIGHT) = GREEN LED
ADDITIONAL TIPS
- Respond to MIDI Clock can be saved independently per preset. Make sure to set this parameter to ON and save each preset you would like to respond to MIDI Clock.
- The SOS looper does not sync to MIDI clock.
HOW CAN I CONTROL VOLANTE WITH MIDI?
MIDI Connections to Volante
To begin using Volante with an external MIDI device, connect the MIDI out jack from a pedal, controller, or computer interface to the EXP jack on Volante. The following devices can be used to send MIDI messages to Volante:
- Strymon MIDI EXP cable (link)
- USB connection from your computer to Volante
- Standard 5-pin DIN MIDI connection
- Compatible 5-pin MIDI to 1⁄4” MIDI Interface:
- Disaster Area Designs – DPC Gen 3 Series, DMC Gen 3 Series, MIDIBox
- Empress Effects – MIDIbox2
CONFIGURING VOLANTE TO USE MIDI
Set EXP jack to DIGITAL Mode
Once you have connected Volante to a MIDI source, you must set the EXP jack to DIGITAL mode.
- Press and hold the TAP footswitch while connecting the pedal to power.
- When the LEDs light up, release the footswitch and turn the ECHO LEVEL knob until the TAP LED turns BLUE.
- Press the TAP footswitch to store the EXP jack assignment.
Set MIDI Channel
Next, you will need to select a MIDI channel to communicate with Volante. Volante is set to MIDI channel 1 by default.
- Press and hold the TAP footswitch while connecting the pedal to power.
- When the LEDs light up, release the footswitch and turn the REC LEVEL knob to set the MIDI channel. The ON LED will change color as the MIDI Channel is changed:
- GREEN – MIDI Channel 1
- AMBER – MIDI Channel 2
- RED – MIDI Channel 3
- BLUE – MIDI Channels 4-16
- This setting requires a 1/4″ MIDI connection to set. Once the LED turns BLUE, it will blink until the pedal receives a MIDI Program Change message. Once a MIDI PC message is received, the pedal will be set to the MIDI channel that the message was sent through and the LED will stop blinking.
- Press the TAP footswitch again to store the MIDI channel assignment and begin using Volante
Set MIDI Output Mode
The MIDI Output mode must be set to determine what kind of MIDI data is sent out by Volante. ***NOTE: If you are only sending MIDI data to Volante or if you are using the Strymon MIDI EXP cable, the MIDI Output mode must be set to OFF.***
- Press and hold the TAP footswitch while connecting the pedal to power.
- When the LEDs light up, release the footswitch and turn the TIME knob to select what kind of MIDI data is sent from Volante to other MIDI devices. The FAV LED will show the status:
- GREEN – ON – Using Volante’s knobs and switches generates MIDI messages that are sent out of Volante.
- AMBER – THROUGH – Incoming MIDI messages are sent out of Volante without any additional MIDI messages generated by Volante.
- RED – OFF (default) – No MIDI messages are sent out of Volante.
SAVING AND RECALLING PRESETS ON VOLANTE WITH MIDI
Saving Presets via MIDI
When using MIDI, the currently loaded settings on the pedal can be saved to any of Volante’s 300 preset locations at any time.
- To initiate the SAVE process, press and hold the FAV footswitch. The FAV LED will start blinking BLUE.
- Send a MIDI Program Change message from your connected MIDI device to Volante. The LED will stop flashing and Volante will save the settings to the preset location that corresponds with the MIDI Program Change message it received.
- To save a preset to the currently loaded preset location, simply press the FAV footswitch once again while the LED is flashing.
Recalling Presets
- To recall presets on Volante, send the pedal a MIDI Program Change message on the same channel the pedal is set to that corresponds to the desired preset you would like to recall.
Volante contains 300 preset locations, numbered sequentially from 0-299. Because MIDI Program Change messages have a maximum number of 128 (0-127) the presets are grouped into three MIDI patch banks:
- MIDI BANK 0 = PRESETS 0-127
- MIDI BANK 1 = PRESETS 128-255
- MIDI BANK 2 = PRESETS 256-299
Volante always powers up in MIDI Patch Bank 0, so if you plan to stay within the first 127 presets, simply send a standard MIDI Program Change message to load a preset.
If you will be using MIDI Banks 1 and/or 2, it is advisable to send a standard MIDI Bank Change message (MIDI CC# 0 with a value equal to the MIDI Bank#) before each MIDI Program Change.
Selecting bank 0, patch 127 will put Volante into Manual mode. In this mode, the pedal will be set to the current knob and switch settings. No preset data can be stored at this preset location.
WHAT ARE THE 3 DELAY TYPES ON VOLANTE?
Volante’s TYPE switch selects between 3 available magnetic recording media types:
- drum – Steel wire spinning platter. Atmospheric echoes emphasize the low-mid frequencies and will saturate with hot signals or high feedback.
- tape – Magnetic tape used in vintage echo machines. Warm tape response with moderately clean and airy signal path.
- studio – Clean studio grade tape used in reel-to-reel units.
WHAT IS THE DELAY TIME RANGE ON VOLANTE?
On Volante, the delay time range is dependent on the setting of the SPEED switch:
- half – 400ms – 4 seconds
- normal – 200ms – 2 seconds
- double – 100ms – 1 second
The maximum record time for the Sound-on-Sound looper is also dependent on the SPEED switch setting:
- half – 64 seconds
- normal – 32 seconds
- double – 16 seconds

