


How to Set Up a PA System for Gigs in Australia?
Posted by Editorial Team on 10th Nov 2026
Table of Contents
- PA System Equipment Checklist for Musicians
- Choosing a PA System for Your Venue Size
- PA Speaker Placement for Live Music
- How to Connect a Mixer to Powered Speakers
- Setting Gain Levels on Your Mixer
- Live Soundcheck Checklist
- Booking Your Gear Before Your Next Gig
- Frequently Asked Questions
Last Updated: November 8, 2026
PA System Equipment Checklist for Musicians
Knowing what to pack is where any guide on how to set up a PA system for gigs in Australia should start.
- Powered or passive loudspeakers, with stands or pole mounts
- A mixing console with enough channels for every input
- Microphones and clips for vocals, drums and amplified instruments
A common mistake is buying a mixer with only a few spare channels.
Industry guide to PA systems for live events covers how modular speaker platforms let production teams scale coverage.
For a compact, lightweight option, the 2026 review of portable PA systems explains why portable setups reduce load-in time for solo performers.
A concrete powered speaker option for your checklist is the anchor text: JBL KP6012 12-inch two-way speaker, a common pick for karaoke and small-venue use.
Choosing a PA System for Your Venue Size
Matching a PA to a room is a coverage and headroom problem, not just a speaker-size problem, and it is one of the key steps in learning how to set up a PA system for gigs in Australia. Two 30-centimetre boxes can be plenty in a Robina café and hopeless in a Broadbeach beer garden, because the room's surfaces, the crowd's absorption and the legal noise ceiling all change the answer.
Work through three numbers before you choose:
- Room volume and shape. A long narrow room needs speakers aimed down the length; a wide shallow room needs wider dispersion or a second pair. A low ceiling with hard surfaces (tiles, glass, exposed concrete) will reflect more sound than a carpeted room with soft furnishings.
- Audience size and density. A standing crowd absorbs far more mid and high frequency than an empty room. A system that sounds bright at soundcheck can sound dull once 150 people are in front of it.
- Required level at the back of the room. Vocals need to stay intelligible at the furthest listener. If the back row is 15 metres from the speakers, a single pair of 25-centimetre boxes on stands will struggle; you need more output, more speakers, or both.
As a working rule for Australian pub and club gigs:
- Under 50 people (cafés, small bars, private functions): One or two 25-centimetre or 30-centimetre powered speakers on stands, plus a compact mixer. Keep the system simple because you are likely running it yourself.
- 50 to 200 people (pubs, clubs, function rooms): Two 30-centimetre or 38-centimetre powered speakers, a small subwoofer if you play bass-heavy material, and stage monitors so performers are not relying on the mains.
- 200 to 500 people (larger venues, outdoor stages): Multiple speaker positions, delays if the room is deep, and a mixer with enough aux sends for monitors. At this size, a system tech or at least a second pair of hands is worth planning for.
The Queensland noise and permit layer most guides skip
In Queensland, how loud you can run is not just a matter of taste. Local councils set noise conditions for amplified music, so check your local council's website to confirm what applies to your gig before you load in.
Practical implications for system choice:
- A smaller, well-controlled system that stays under the venue's noise limit is often a better business decision than a larger rig you have to keep turned down.
- Outdoor gigs near residential areas may have a hard cut-off time and a measured limit at the boundary. That changes how much subwoofer you can usefully deploy.
- If the venue holds a liquor licence with noise conditions, agree levels with the venue at soundcheck.
Powered vs passive, and what that means for sizing
Powered speakers have the amplifier built in, which simplifies cabling and means the manufacturer has already matched amplifier power to the driver.
Industry guide to PA systems for live events covers how modular speaker platforms let production teams scale coverage.
For a compact, lightweight option, the 2026 review of portable PA systems explains why portable setups reduce load-in time for solo performers.
| Audience size |
|---|
| --- |
| Note |
| --- |
| Under 50 people |
| 50 to 200 people |
| 200 to 500 people |
| Outdoor events |
PA Speaker Placement for Live Music
Placement does more for perceived sound quality than most gear upgrades. The goal is to get direct sound to the audience before reflections muddy it, and to keep the speakers out of the microphones' pickup pattern.
The basic geometry
- Put speakers at roughly ear height on stands, tweeter at or slightly above seated/standing ear level, and angle them toward the audience, not straight down the stage.
- Place the speakers slightly in front of the performers so the band hears the mix from stage monitors, not from behind the mains.
- Aim each speaker at the furthest listener it serves. If the back of the room is off-axis, that listener gets mostly reflected sound and the vocal intelligibility drops.
Small, reflective rooms: the problem most guides ignore
Local pubs, cafés and function rooms are often small, with hard floors, glass frontages and low ceilings. In those rooms, reflections arrive at the listener almost as loudly as the direct sound, which smears vocals and makes the system sound louder and harsher than it is.
What actually helps:
- Aim, don't crank. Point speakers at the audience and away from the back wall and side glass. A speaker aimed at a hard wall is mostly heating the room, not the crowd.
- Get speakers closer to the audience. Shorter throw means less direct-to-reflected ratio problem and less level needed overall.
- Use the room's soft surfaces. Curtains, carpet, soft seating and even a packed crowd absorb high and mid frequencies. If the room is empty at soundcheck, expect it to sound brighter than it will during the set.
Outdoor and hot-weather placement
Australian outdoor gigs bring their own placement rules:
- Wind steals high frequencies. Aim speakers so the audience is downwind where you can, and accept that intelligibility will drop in gusty conditions.
- Heat and sun degrade gear. Keep amplifiers and powered speakers out of direct sun where possible, and allow airflow around them. Powered speakers that overheat can cut out mid-set.
- Humidity and sudden rain. Have covers or a quick pack-down plan. Even a light shower can end a set if the gear is not protected.
- Neighbours and boundaries. Outdoors, sound travels. Place speakers so the main lobe points into the audience and away from nearby residences, and confirm the venue's noise conditions before soundcheck.
Avoiding feedback when positioning speakers
Feedback happens when a microphone picks up sound from a speaker and sends it back through the system. To reduce it:
- Keep microphones away from the front of speakers, and keep the mic behind the speaker's plane where possible.
- Point the speaker away from microphones where you can.
- Lower the gain on any microphone that starts to whistle.
- Ring out the system at soundcheck: bring up each mic until it just starts to feed, then pull back slightly and note the frequency.
If feedback starts mid-set, pull the fader down on that channel first, then adjust the speaker angle. Do not try to fix it by turning up the master volume, that makes it worse.
!A musician's hands plugging XLR and speaker cables into a mixing console on a small stage, with a powered speaker beside it
How to Connect a Mixer to Powered Speakers
Connecting a mixer to powered speakers is simple once you follow the right order. Turn everything down before you plug anything in.
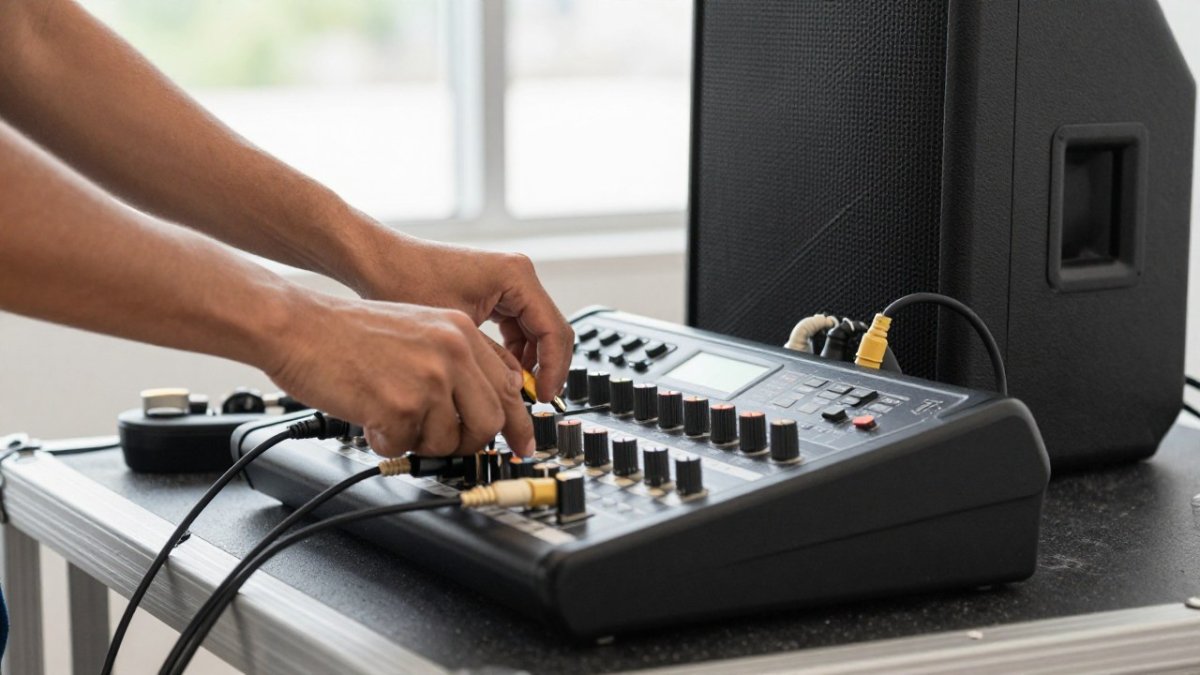
- Set all faders and the master volume to zero.
- Connect your microphones and instruments to the mixer inputs using XLR or line cables.
- Run a cable from the mixer's main left and right outputs to the speaker inputs.
- Plug the speakers into power last.
- Power up the mixer, then the speakers.
If your speakers are powered, you do not need a separate amplifier. The anchor text: Skytec SKY-3000 power amplifier is one option for that job.
Watch out: turning on powered speakers while the mixer is loud can send a thump through the system and damage speakers.
!A musician's hands plugging XLR and speaker cables into a mixing console on a small stage, with a powered speaker beside it
Setting Gain Levels on Your Mixer
Gain sets how much signal each input receives. Set it before you touch the faders.
- Play or sing at your loudest expected volume.
- Turn up the gain until the input meter reaches around the middle of the green range, and stays below the red.
- Bring the channel fader up to a normal working level, usually near the 0 mark.
- Repeat for every input.
Setting gain too high causes distortion. Setting it too low makes the system noisy when you raise the faders. Aim for a clean signal that sits comfortably below clipping.
Live Soundcheck Checklist
A soundcheck is your chance to find problems before the crowd arrives. Run through this list once everything is connected.
- Check each microphone and instrument one at a time
- Confirm every speaker is playing, with the correct left and right balance
- Listen for hum, buzz or crackle, and check cables if you hear any
- Set monitor levels so performers can hear themselves clearly
Leave a few minutes at the end to recheck anything you changed. A quick final listen often catches problems that the first pass missed.
Booking Your Gear Before Your Next Gig
If you need to add gear before a gig, order early so it arrives in time. For a performer who needs a wireless vocal system, the anchor text: Shure BLX wireless handheld system with SM58 microphone is a reliable option to check. For matched condenser microphones to capture instruments or vocals, see the anchor text: Behringer C-2 matched condenser microphone pair.
For current pricing and availability, check the product pages or contact the Muzic Man team directly.
Muzic Man's Gold Coast shop also gives you the chance to handle gear in person before you buy.
Setting up a PA system for gigs in Australia is a skill that improves with each show. Start with a clear gear list, match your speakers to the room, and run a soundcheck every time.
Frequently Asked Questions
What equipment do I need to set up a PA system for a gig?
A basic gig PA needs a mixing console, powered or passive speakers with stands, microphones with stands, XLR cables, a DI box for keyboards or electric instruments, and power leads with a surge-protected power board. For a small venue, two powered speakers and a compact mixer covers most acoustic or duo setups. Check that your cables are long enough to reach the venue's power points without running them across walkways, and pack spares of the cables you use most, since they are the parts that fail first on the road.
How do you connect a mixer to PA speakers?
If you are using powered speakers, run an XLR or TRS line from the mixer's main left and right outputs into the speaker inputs, then connect power last. Keep the mixer's master fader low while you make connections. Check which input type your speakers take before buying cables, as some use XLR and others use 6.35 mm jacks. Turn everything on in signal-flow order, starting with the sources and ending with the speakers, and reverse the order when you pack up.
Where should PA speakers be positioned for a live gig?
Place the main speakers on stands either side of the stage at roughly ear height, angled towards the audience, and slightly in front of the performers so the band can hear the mix from the stage. Keep the speakers away from walls and corners where bass builds up, and avoid pointing them straight at microphones. Test the positions with a short sound check and adjust until the vocals are clear from the back of the room.
What should I check during a live soundcheck?
Check each microphone and instrument one at a time, confirming a signal on the channel meter and that each source is audible in the monitors and front of house. Set levels so peaks sit around the top of the green range without clipping, balance the vocals against the instruments, and listen from the back of the venue as well as the stage. Finish by playing a few bars of the full set so you catch any feedback or level jumps before the audience arrives.