


Best Pro Audio Gear for Musicians: 2026 Guide
13th Sep 2026
Table of Contents
- Quick Comparison: Best Pro Audio Gear Picks for 2026
- Essential Home Studio Equipment List: What to Buy First
- Professional Audio Interface Comparison: Which One Fits Your Setup
- Best Studio Monitors for Home Recording: Matching Speakers to Your Room
- Microphones and Preamps: Choosing the Right Capture Chain
- DAWs, MIDI Controllers and Hardware Synths That Earn Their Place
- Buying Pro Audio Gear in Australia: Used vs New, Shipping and Local Support
- Frequently Asked Questions
Last Updated: September 13, 2026
Quick Comparison: Best Pro Audio Gear Picks for 2026
Choosing the best pro audio gear comes down to matching each component to your room, your source, and your workflow rather than chasing the most expensive option. At Muzic Man, we see this daily on our Robina shop floor: a condenser microphone can sound worse than a workhorse dynamic in an untreated room, while a modest interface paired with good monitoring will outlast a flagship purchase made too early.
The signal chain is the organising principle behind every pick below: each link, from microphone to preamplifier to interface to monitor, either preserves or degrades what the previous stage captured. Below, we cover what to buy first, which interface suits which setup, how to match monitors to your room, and how to buy wisely across the used and new market.
| Component | Priority | What It Does | Best For |
|---|---|---|---|
| Audio interface | Buy first | Converts analogue to digital | Every setup |
| Studio monitors | Buy second | Accurate playback for mixing | Mixing and reference |
| Microphone | Buy third | Captures the source | Vocals and instruments |
| Preamplifier | Add later | Clean gain before conversion | Low-output mics, ribbons |
| MIDI controller | Optional | Hands-on control of software | Producers and composers |
| Acoustic treatment | Ongoing | Controls room reflections | Any untreated room |
Essential Home Studio Equipment List: What to Buy First
The essential home studio equipment list starts with four items: an audio interface, studio monitors or reference headphones, one versatile microphone, and the cables and power infrastructure to run them cleanly. Everything else is an upgrade, not a starting point.
At Muzic Man, the most common mistake we see is musicians buying a microphone before they own a way to hear it accurately. Without monitoring you cannot judge whether a purchase improved anything.
A practical first-purchase sequence:
- Audio interface with at least two combination inputs
- Reference headphones, then studio monitors when budget allows
- One large-diaphragm condenser and one dynamic microphone
- XLR cables, a headphone amplifier if needed, and a power conditioner
Cables, Power and the Small Items People Forget
Budget for XLR cables, a microphone stand, a pop filter, and a power conditioner before buying a second microphone. These rarely appear in gear roundups, yet a noisy power supply or failing cable introduces hum no plugin can remove.
- XLR cables: buy balanced, shielded, and longer than you think you need
- Power: a conditioner protects against the surges common in older Queensland homes
- Patch bay: worth adding once you own more than three outboard pieces
Professional Audio Interface Comparison: Which One Fits Your Setup
A professional audio interface comparison should begin with input count and preamp quality, not brand prestige. Two combination inputs cover most solo recording; four or more become necessary once you track drums or multiple players. What separates tiers is rarely the converter chip, it is preamp headroom, driver stability, and how the unit behaves when your DAW is under load.
Sample rate and bit depth determine conversion resolution, while latency determines whether you can monitor in real time. Most modern interfaces handle 24-bit/192kHz comfortably, so the practical differentiators are preamp gain range, direct monitoring, and driver support on the operating system you actually run.
Interface Tiers by Setup
- Solo singer-songwriter: two inputs, bus-powered USB, one headphone output with independent level control. Focusrite Scarlett 2i2 and Audient iD14 are the common reference points at this tier.
- Small band: four to eight inputs, ADAT expansion for adding channels later, dedicated monitor outputs with a physical volume knob. Universal Audio Volt 476 and Focusrite Scarlett 18i20 sit here.
- Producer with outboard gear: extra line inputs, insert points, and a patch bay connection. Universal Audio Apollo and RME Babyface Pro FS are the usual step-up choices, and RME's driver reputation is the main reason engineers pay the premium.
What Most Guides Miss
Preamp quality varies far more between price tiers than converter quality does. The converters in budget interfaces are competent; the preamps are where corners get cut. Low-output ribbon microphones need a preamplifier with substantial clean gain, often 60dB or more, or a direct box for instruments (soundonsound.com). A ribbon mic through a budget preamp at maximum gain usually sounds thin and noisy, and no plugin fixes that.
Driver stability is the other under-discussed factor. An interface with excellent preamps but unreliable drivers costs more studio time than one with average preamps and rock-solid drivers. This matters more on Windows than macOS, where class-compliant behaviour covers more ground.
Buying an Interface in Queensland
If you are in Robina or anywhere across the Gold Coast, buying locally lets you test driver behaviour on your own laptop before committing. Bring your machine, install the driver at the counter, and confirm the interface is recognised and monitoring works. Online-only purchases remove that step, and a driver conflict discovered after shipping is slow to solve.
Australian consumer law gives you a remedy if a new interface fails to do what it was sold to do, but that process is slower than a counter swap (accc.gov.au). For interfaces, buying new from a local retailer is usually better, firmware updates, warranty service, and easy returns all favour it.
- Solo: two inputs, bus-powered, one headphone output
- Small band: four to eight inputs, ADAT expansion, dedicated monitor outputs
- Producer with outboard: extra line inputs, insert points, patch bay connection
Best Studio Monitors for Home Recording: Matching Speakers to Your Room
The best studio monitors for home recording fit your room, not the largest woofer. A typical spare bedroom in Robina measures around three by four metres, and a five-inch driver suits that space far better than an eight-inch model that overloads the low end (soundonsound.com).
Room size dictates driver size, and treatment dictates how much of what you hear is actually the speaker. Australian homes often have hard floors, large windows, and open-plan living areas, all creating reflections that flatter or deceive your ears.
- Small room under 12 square metres: five-inch drivers, close placement
- Medium room: six to seven-inch drivers, stands at ear height
- Untreated room: prioritise acoustic treatment before upgrading speakers
Microphones and Preamps: Choosing the Right Capture Chain
A microphone and preamplifier should be chosen together, because a demanding microphone paired with a weak preamp produces a thin, noisy result. The signal chain begins here, and every later stage inherits whatever this one delivers.
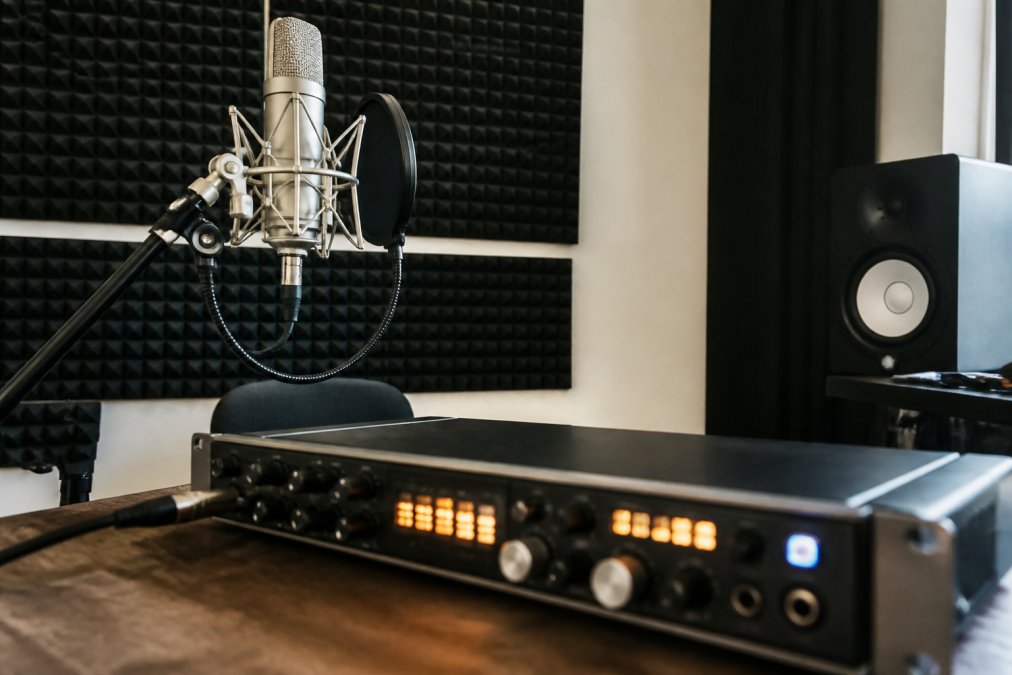
A versatile condenser such as the AKG C414 XLII offers nine polar patterns, three bass-cut filters, and high SPL handling, making it a genuine all-rounder for vocals and acoustic instruments. Its sensitivity is also its weakness: in an untreated room it captures every reflection.
Phantom power is required for condenser microphones and is supplied by most interfaces. Dynamic microphones need none, handle high SPL well, and reject room sound, which makes them the safer first purchase for untreated spaces.
Condenser vs Dynamic: Which Suits Your Room and Source
Choose a condenser for detail and a dynamic for durability and room rejection. Condensers suit vocals, acoustic guitar, and overheads in a treated space; dynamics suit drums, guitar cabs, and loud sources, and forgive imperfect rooms.
- Condenser: detailed, sensitive, needs phantom power and a quiet room
- Dynamic: strong, high SPL handling, forgiving of reflections
- Ribbon: warm and natural, but fragile and gain-hungry
DAWs, MIDI Controllers and Hardware Synths That Earn Their Place
Your DAW choice should follow your platform and workflow, not the marketing. Ableton Live 12 suits electronic producers and live performers, Logic Pro offers strong value for Mac-based songwriters, Reaper appeals to engineers wanting a lightweight, customisable environment, and Avid Pro Tools remains the standard where session compatibility with professional studios matters. Cubase and Studio One round out the field for composers wanting strong MIDI editing and linear arrangement.
The practical question is not which DAW is best but which one you will actually finish songs in. A DAW you know deeply outperforms a more powerful one you are still learning. If you collaborate, matching their DAW removes a conversion step that costs time and sometimes fidelity.
MIDI Controllers: When They Earn Their Place
A MIDI controller earns its place when it speeds up composition, not when it sits unused under a desk. The useful distinction is between keyboard controllers, pad controllers, and combined units.
- Keyboard controllers: Arturia KeyLab Essential and Novation Launchkey are the common entry points, both with DAW integration that maps transport and mixer controls automatically.
- Pad controllers: Akai MPC Studio and Ableton Push suit beat-makers who work in clips or patterns rather than linear arrangement.
- Combined units: Native Instruments Komplete Kontrol ties hardware to software instruments, which is useful if you already use the Komplete library.
The mistake is buying a controller with more features than your workflow uses. A 61-key controller with weighted action is the wrong purchase if you only program drums. A 25-key controller is the wrong purchase if you play piano parts.
Hardware Synths: When They Change How You Write
A hardware synthesizer earns its place when its interface changes how you write, which is why many producers keep one hands-on instrument alongside their software. The value is not the sound, software matches most hardware timbres, but the constraint and immediacy of a fixed interface.
- Mono synths: Moog Subsequent 25 and Korg Minilogue XD suit bass and lead work where one knob per function speeds up sound design.
- Poly synths: Novation Peak and Sequential Take 5 offer hands-on polyphony without a computer.
- Grooveboxes: Elektron Digitakt and Roland MC-707 suit producers who want sequencing and sampling in one box.
Buying DAWs, Controllers and Synths in Australia
Software is the easiest purchase to get right, buy direct from the developer and you get the same licence anywhere. Hardware is different. Controllers and synths are physical items where key feel, pad sensitivity, and knob resistance matter, and those cannot be assessed from a spec sheet.
On the Gold Coast, buying locally lets you play a controller before committing. Keybed feel varies enormously between models at the same price, and a controller that feels wrong will not get used regardless of its features. For synths, local purchase also means local warranty service, which matters more on instruments with analogue components and moving parts.
- Ableton Live 12: electronic production and live performance
- Logic Pro: Mac users wanting a deep stock library
- Reaper: engineers who value flexibility and low system overhead
- Pro Tools: session interchange with professional facilities
- Cubase and Studio One: composers and linear-arrangement producers
Buying Pro Audio Gear in Australia: Used vs New, Shipping and Local Support
Buying pro audio gear in Australia involves a genuine trade-off between used value and new warranty coverage. The used market offers strong savings on discontinued models, but you inherit wear on moving parts, uncertain history, and no manufacturer support.
New gear brings warranty, firmware support, and the ability to return an item that does not suit your room. For interfaces and monitors, where drivers and firmware matter, new is usually better. For stands, cables, and passive outboard, used is often sensible.
Local support changes the calculation further. Walking into a Robina store, plugging into an interface, and hearing it through monitors removes the guesswork of online-only shopping. If you are searching for pro audio gear near me, a counter where you can compare options side by side is worth more than a marginally lower online price.
- Used: best for passive gear, stands, cables, discontinued classics
- New: best for interfaces, monitors, and anything firmware-dependent
- Local: best for anything you need to hear before committing
Frequently Asked Questions
What essential pro audio gear do I need for a home studio in Australia?
Start with four things: an audio interface, a pair of studio monitors or monitoring headphones, one versatile microphone, and a DAW. Add XLR cables, a boom stand and a pop filter, then treat your room with absorptive panels. Everything else, such as outboard compressors or extra preamps, can wait until a specific project demands it. Buying the core chain first keeps your budget focused and lets each later purchase solve a real problem.
What is the best professional audio interface for recording vocals?
Look for clean preamps, switchable phantom power and low-latency drivers. A two-input interface covers most vocal work because it leaves a spare channel for a guitar or a second mic. Check that the unit offers at least 24-bit conversion and a headphone output you can monitor through without audible delay. If you track frequently, a metal chassis and reliable drivers matter more than a long list of extra features you will rarely use.
How do I choose the right studio monitors for my room size?
Smaller rooms suit monitors with five to six inch woofers, while larger spaces can handle seven or eight inch drivers without the low end becoming muddy. Placement matters as much as the speaker itself: keep monitors at ear height and away from corners to reduce boom. If your room is untreated, a front-ported design gives you more flexibility about how close the speakers sit to the wall behind them.
Is it worth investing in high-end outboard gear for digital production?
Only after your room, monitoring and interface are sorted. Outboard compressors and equalizers add character, but their benefit is hard to hear through an untreated room or unreliable monitoring. A common path is to upgrade the interface and acoustic treatment first, then add one quality outboard unit you will actually use on every session. For most home producers, plugins cover the basics well before hardware becomes the limiting factor.
Should I buy used or new pro audio gear in Australia?
Used gear stretches a budget further, particularly for microphones, monitors and outboard units that hold value well. Check that the item powers on, that drivers and capsules are undamaged, and that any software licence transfers to you. New gear gives you warranty coverage and the option of a hands-on demo, which matters for anything you need to feel before committing. For a first serious purchase, warranty support often outweighs the saving.
Matching gear to your room, your source, and your workflow is the difference between a studio that works and a collection of boxes that never quite gels. Muzic Man stocks many branded instruments and supplies, offers Australia-wide shipping, and keeps a physical shop in Robina where you can hear the difference before you buy. Browse the online store or visit us on the Gold Coast to get started with gear that fits how you actually record.